Single Session
Configure Channel Provider
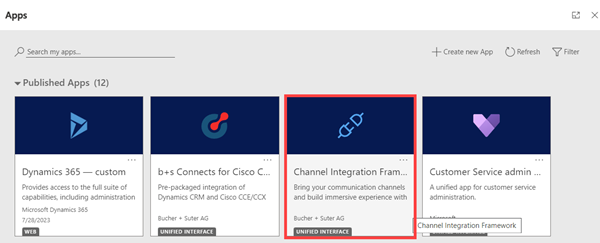
Step 1: Navigate to Channel Integration Framework.

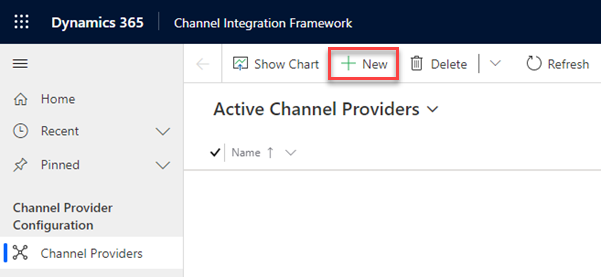
Step 2: Create a new channel provider.

Step 3: Specify the following values.
| Field | Description |
|---|---|
| Name | Name of the channel provider, this can be any name |
| Label | The label is displayed as the title on the widget, this can be any label |
| Channel URL | Finesse: https://<yourorg>.crm<num>.dynamics.com/WebResources/cnx_index.htmlWxCC: https:// <yourorg>.crm<num>.dynamics.com/WebResources/cnx_index_wxcc.html |
| Enable Outbound Communication | Yes |
| Channel Order | 1 |
| API Version | 1.0 |
| Select the Unified Interface Apps for the Channel | Select the Unified Interface Apps where b+s Connects gadget is displayed. |
| Select Roles for the Channel | Assign one or both of the provided roles Connects Agent and Connects Administrator. Note: If you do not assign any role, the channel provider is shown to all users that can access the selected Dynamics 365 Unified Interface Apps. |
Step 4: Click Save to keep your changes.
info
For a full description of all fields refer to the official documentation.
Continue the installation with configure Contact Center and configure Service Layout