Unified Service Desk Configuration
This guide describes b+s Connects for Microsoft Dynamics in Unified Service Desk (USD) additional/advanced configurations.
Prerequisites
- b+s Connects for Microsoft Dynamics installed and configured as outlined here.
- The Channel Communication Control is added to the Unified Interface form (e.g. contact) as described in Step 2 here.
Click-to-call
Step 1: Navigate to Hosted Controls.
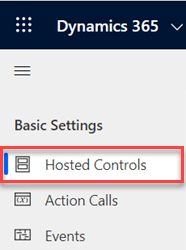
Step 2: Search and open the Hosted Control which triggers the onclicktoact event (e.g. Contact).
Step 3: Specify the following properties.
| Property | Value |
|---|---|
| Hosting Type | Chrome Process |
Step 4: Click Save to keep your changes.
Step 5: Navigate to Action Calls.
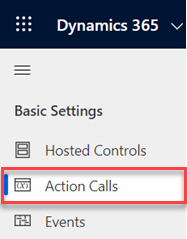
Step 6: Search for and open "Raise click to act event on CIF control".
Step 7: Provide the following properties and save your changes.
| Property | Value |
|---|---|
| Name | Raise click to act event on CIF control |
| Hosted Control | bsConnects |
| Action | RaiseCifClientEvent |
| Data | event = 'onclicktoact'data = '[[data]+]' |
Step 8: Navigate to Events.
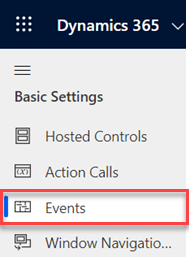
Step 9: Create a new event, provide the following properties and save your changes (this example utilizes Contact).
| Property | Value |
|---|---|
| Name | OnClickToAct |
| Hosted Application | Contact |
| Active Action | Raise click to act event on CIF control |
Limitation: USD CIF 1.0 translates + signs to spaces, in order to be able to dial a number with a leading plus, adjust the click-to-dial rules in the ServiceLayout. Example: [1,10]->^\s(\d+)->+$1
Collapsed Mode
Step 1: Navigate to Hosted Controls.

Step 2: Search for and open "Custom Panel".

Step 3: Edit the XAML definition.
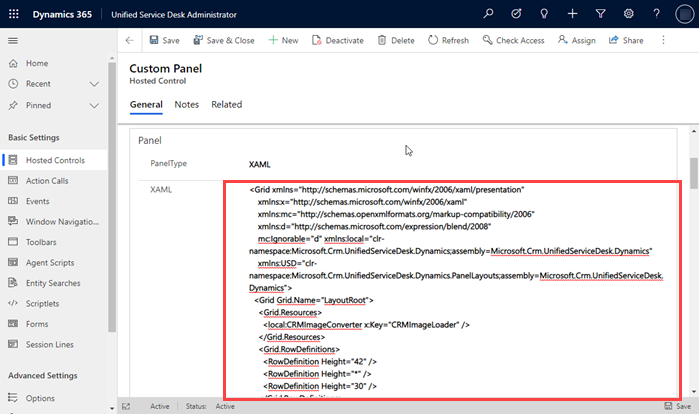
Step 4: Find inside of <Grid> with Grid.Row="2" and AutomationProperties.Name="Main Panels" the <Grid.ColumnDefinitions>.
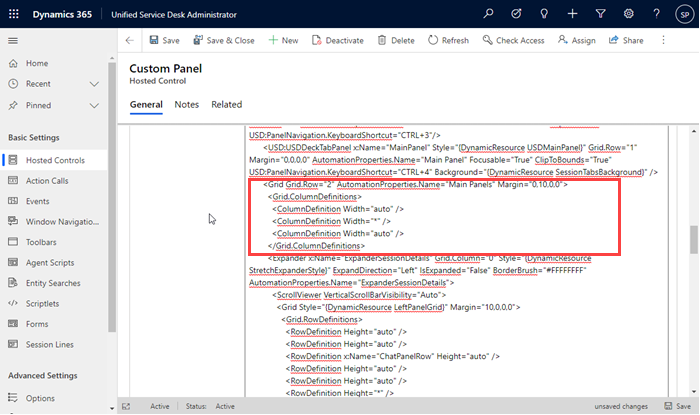
Step 5: Add <ColumnDefinition Width="auto" /> before the closing tag </Grid.ColumnDefinitions>.
Step 6: Add the following XAML code after the </Grid.ColumnDefinitions>.
<Grid Grid.Column="3" x:Name="CnxGrid" Width="300">
  <Grid.RowDefinitions>
    <RowDefinition Height="25" />
    <RowDefinition Height="*" />
  </Grid.RowDefinitions>
  <USD:USDDeckTabPanel x:Name="CnxPanelButton" AutomationProperties.Name="CNX Panel Button" Grid.Row="0"  Height="25" />
  <USD:USDDeckTabPanel x:Name="CnxPanel" AutomationProperties.Name="CNX Panel" Grid.Row="1" />
</Grid>
Step 7: Check if the code looks like:
<Grid Grid.Row="2" AutomationProperties.Name="Main Panels" Margin="0,10,0,0">
  <Grid.ColumnDefinitions>
    <ColumnDefinition Width="auto" />
    <ColumnDefinition Width="*" />
    <ColumnDefinition Width="auto" />
    <ColumnDefinition Width="auto" /> <!-- this is the newly added ColumnDefinition -->
  </Grid.ColumnDefinitions>
  <Grid Grid.Column="3" x:Name="CnxGrid" Width="300">
    <Grid.RowDefinitions>
      <RowDefinition Height="25" />
      <RowDefinition Height="*" />
    </Grid.RowDefinitions>
    <USD:USDDeckTabPanel x:Name="CnxPanelButton" AutomationProperties.Name="CNX Panel Button" Grid.Row="0"  Height="25" />
    <USD:USDDeckTabPanel x:Name="CnxPanel" AutomationProperties.Name="CNX Panel" Grid.Row="1" />
  </Grid>
Step 8: Click Save to keep your changes.
Step 9: Create a new hosted control and provide the following properties.
| Property | Value |
|---|---|
| Name | Custom Panel Button |
| Unified Service Desk Component Type | Standard Web Application |
| Hosting Type | Chrome Process |
| Application is Global | checked |
| Display Group | CnxPanelButton |
| Application is Dynamic | No |
Step 10: Click Save to keep your changes.
Step 11: Search and open the hosted control "bsConnects".
Step 12: Adjust the following property.
| Property | Value |
|---|---|
| Display Group | CnxPanel |
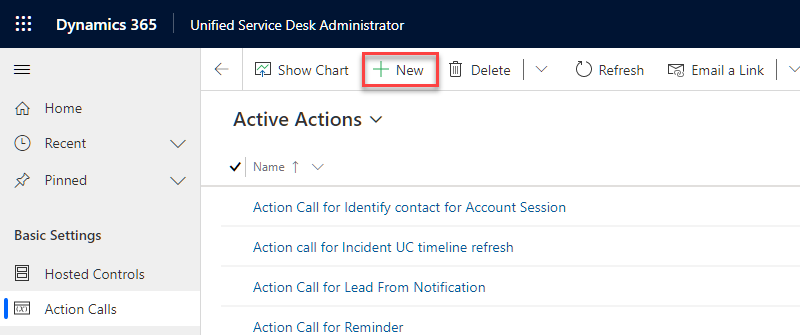
Step 13: Navigate to Action Calls.

Step 14: Create a new action call.
Step 15: Provide the following properties and save your changes.
| Property | Value |
|---|---|
| Name | Initialize UI mode to full on context |
| Order | 1 |
| Hosted Control | CRM Global Manager |
| Action | CopyToContext |
| Data | bsConnectsMode=1 |
Step 16: Create a new action call with the following properties.
| Property | Value |
|---|---|
| Name | Set mode for CIF |
| Order | 1 |
| Hosted Control | Dashboard |
| Action | RunXrmCommand |
| Data | webResourceName=cnx_CIFXrmCommands.jsfunctionName=setMode'[[mode]+]' |
Step 17: Click Save to keep your changes.
Step 18: Create a new action call with the following properties.
| Property | Value |
|---|---|
| Name | Load collapse button |
| Order | 1 |
| Hosted Control | Custom Panel Button |
| Action | Navigate |
| Data | url=/WebResources/cnx_collapsebutton.html |
Step 19: Click Save to keep your changes.
Step 20: Create a new action call with the following properties.
| Property | Value |
|---|---|
| Name | Change UI mode |
| Order | 1 |
| Hosted Control | bsConnects |
| Action | RunScript |
Data (copy&paste):
var oldMode = '[[$Context.bsConnectsMode]+]';

if (oldMode === '1') {
  window.open('http://event/?eventname=SetMode&mode=0');
} else {
  window.open('http://event/?eventname=SetMode&mode=1');
}
Step 21: Click Save to keep your changes.
Step 22: Navigate to Events.

Step 23: Create a new event.

Step 24: Provide the following properties and save your changes.
| Property | Value |
|---|---|
| Name | ToggleMode |
| Hosted Application | Custom Panel Button |
| Active Actions | Change UI mode |
Step 25: Create a new event with the following properties.
| Property | Value |
|---|---|
| Name | SetMode |
| Hosted Application | bsConnects |
| Active Actions | Set mode for CIF |
Step 26: Click Save to keep your changes.
Step 27: Search for and open the event "DesktopReady".
Step 28: Adjust the following properties and save your changes.
| Property | Value |
|---|---|
| Hosted Application | CRM Global Manager |
| Active Actions | Load collapse button Initialize UI mode to full on context |
Custom Colors
Custom colors can be applied to the b+s Connects for Microsoft Dynamics.
Step 1: Navigate to Unified Service Desk Administrator.

Step 2: Navigate to Hosted Controls.

Step 3: Search for and open "bsConnects".
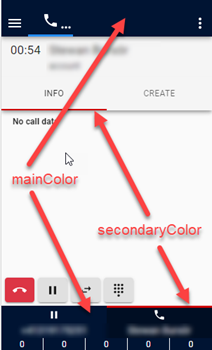
Step 4: Copy mainColor=[mainColor]&secondaryColor=[secondaryColor] in Custom Parameters.
Step 5: Replace [mainColor] and [secondaryColor] with the desired colors.
Examples
The values of the colors can be defined in hexadecimal, RGB or HSL.
| Custom Parameter | |
|---|---|
| Hexadecimal | mainColor=#001433&secondaryColor=#990000 |
| RGB | mainColor=rgb(0,20,51)&secondaryColor=rgb(153,0,0) |
| HSL | mainColor=hsl(216,100%,10%)&secondaryColor=hsl(0,100%,30%) |
Step 5: Save the configuration.
Customize USD
USD is highly customizable and the behavior of USD can be adjusted to meet customer requirements.
Example: if the customer wants to screen-pop a record on a specific criteria, the action call can be adjusted as follows:
Step 1: Navigate to Action Calls.

Step 2: Provide the following properties and save your changes.
| Property | Value |
|---|---|
| Name | Open form for CIF |
| Order | - |
| Hosted Control | Dashboard |
| Action | RunScript |
Data (copy&paste):
function rejectWithError(CifHostedControl, corrId, err, apiname){
  var data = "corrId='"+ corrId + "' %0D%0A";
  data += "action='reject' " + "%0D%0A";
  data += "result=" + encodeURIComponent(JSON.stringify(err)) + "%0D%0A";
  data += "api='" + apiname + "'";
  window.top.notifyUSD("http://uii/"+CifHostedControl+"/UpdateCifContext?"+ data);
}

function resolvePromise(CifHostedControl, corrId, res, apiname){
  var data = "corrId='"+ corrId + "' %0D%0A";
  data += "action='resolve' " + "%0D%0A";
  data += "result=" + encodeURIComponent(JSON.stringify(res)) + "%0D%0A";
  data += "api='" + apiname + "'";
  window.top.notifyUSD("http://uii/"+CifHostedControl+"/UpdateCifContext?"+ data);
}

function openForm(CifHostedControl, corrId, formOptions, formParams){
  if("[[$Context.Id]+]".toLowerCase() === formOptions.entityId.toLowerCase()) {
    resolvePromise(CifHostedControl, corrId, { message: 'record already open' }, "openform");
    return;
  }

  Xrm.Navigation.openForm(formOptions, formParams).then(
    function(res){
      resolvePromise(CifHostedControl, corrId, res, "openform");
    },
    function(err){
      rejectWithError(CifHostedControl, corrId, err, "openform");
    }
  );
}

openForm('bsConnects','[[corrId]+]',[[entityFormOptions]+],[[entityFormParameters]+]);