Contact Centers
The Contact Center configuration comes with several options to fine-tune the Finesse Server connection.
All these options are shipped with out-of-the-box default values. To start with, you only have to provide the server URLs and XMPP ports.
Please note that changing the Finesse configuration means that all agents that have been assigned to this configuration in the Agent Settings will have to log in again the next time the page is reloaded. This does not apply if Auto Login is configured.
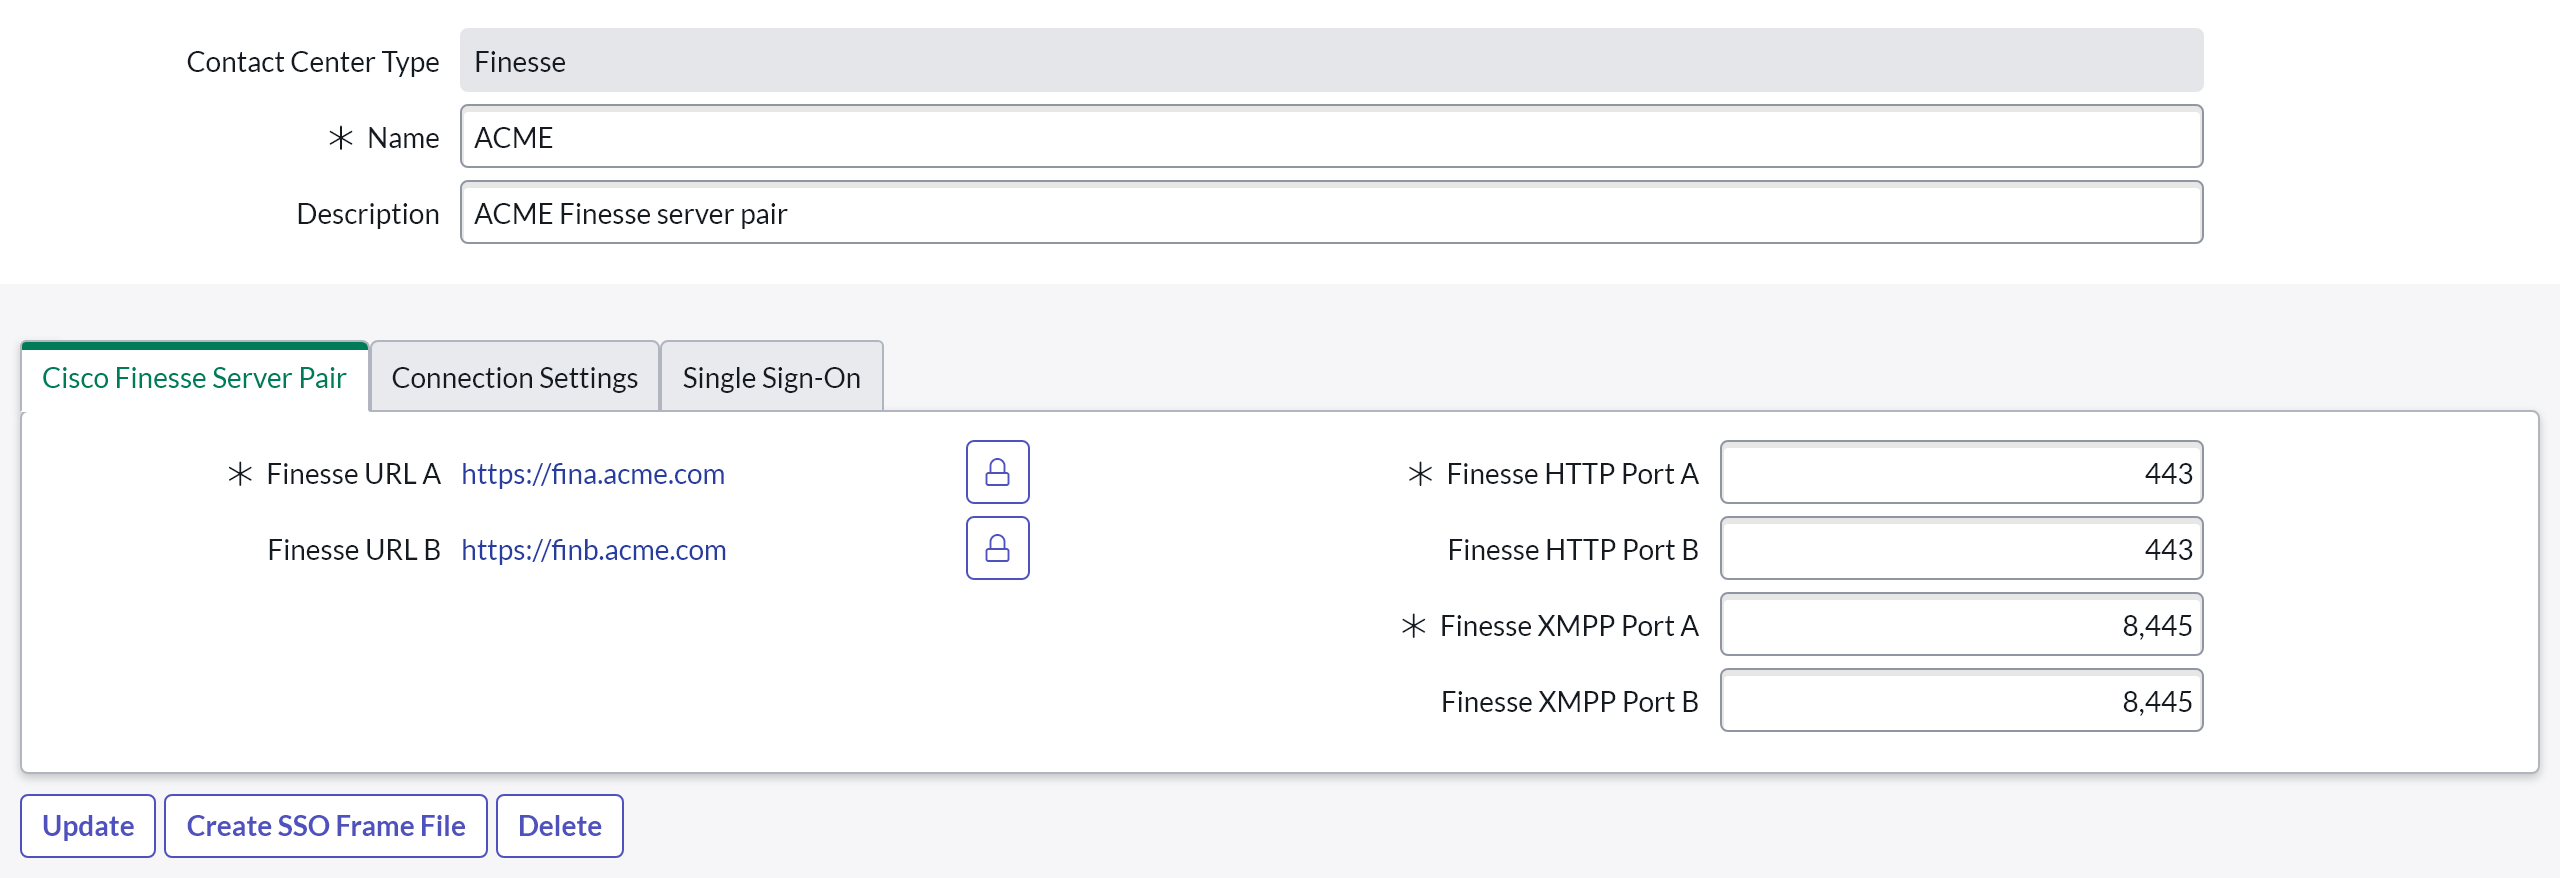
Contact Center Type
The type of the Contact Center. One can choose between "Finesse" for a UCC based Contact Center and "WxCC" for a Webex Contact Center.
The following fields apply for a Finesse Contact Center.
Name
The name of the Contact Center. The value entered here is used as a reference for further configuration.
Required: Yes
Default value: Empty
Description
Alternative text which helps in identifying the Finesse Server pair.
Required: No
Default value: Empty
Cisco Finesse Servers

For VPN-Less Finesse, use the Proxy URL.
Finesse URL A
The URL of the primary Finesse Server in the format of < Protocol >://< FQDN >. Do not provide a port number in this field.
Required: Yes
Default value: https://myFinesseServerA.myDomain
Finesse URL B
The URL of the secondary Finesse Server in the format of < Protocol >://< FQDN >. Do not provide a port number in this field.
Required: No
Default value: https://myFinesseServerB.myDomain
Finesse HTTP Port A
The port on which the Finesse Server Rest API (Side A) is listening.
Required: Yes
Default value: 443
In CCX deployments, use HTTP port 8445.
Finesse HTTP Port B
The port on which the Finesse Server Rest API (Side B) is listening.
Required: No
Default value: 443
In CCX deployments, use HTTP port 8445.
Finesse XMPP Port A
The port on which the Finesse Notification Service (Side A) is listening.
Required: Yes
Default value: 8445
In CCE deployments, the XMPP port changed to 8445 with Finesse version 12.6(1). For Finesse versions below 12.6(1), use port 7443.
Finesse XMPP Port B
The port on which the Finesse Notification Service (Side B) is listening.
Required: No
Default value: 8445
In CCE deployments, the XMPP port changed to 8445 with Finesse version 12.6(1). For Finesse versions below 12.6(1), use port 7443.
When editing the details field in the List View please adhere to the following format: URL A: {Finesse_URL_A} - URL B: {Finesse_URL_B} - HTTP Port A: {HTTP_PORT_A} - HTTP Port B: {HTTP_PORT_B} - XMPP Port A: {XMPP_PORT_A} - XMPP Port B: {XMPP_PORT_B}
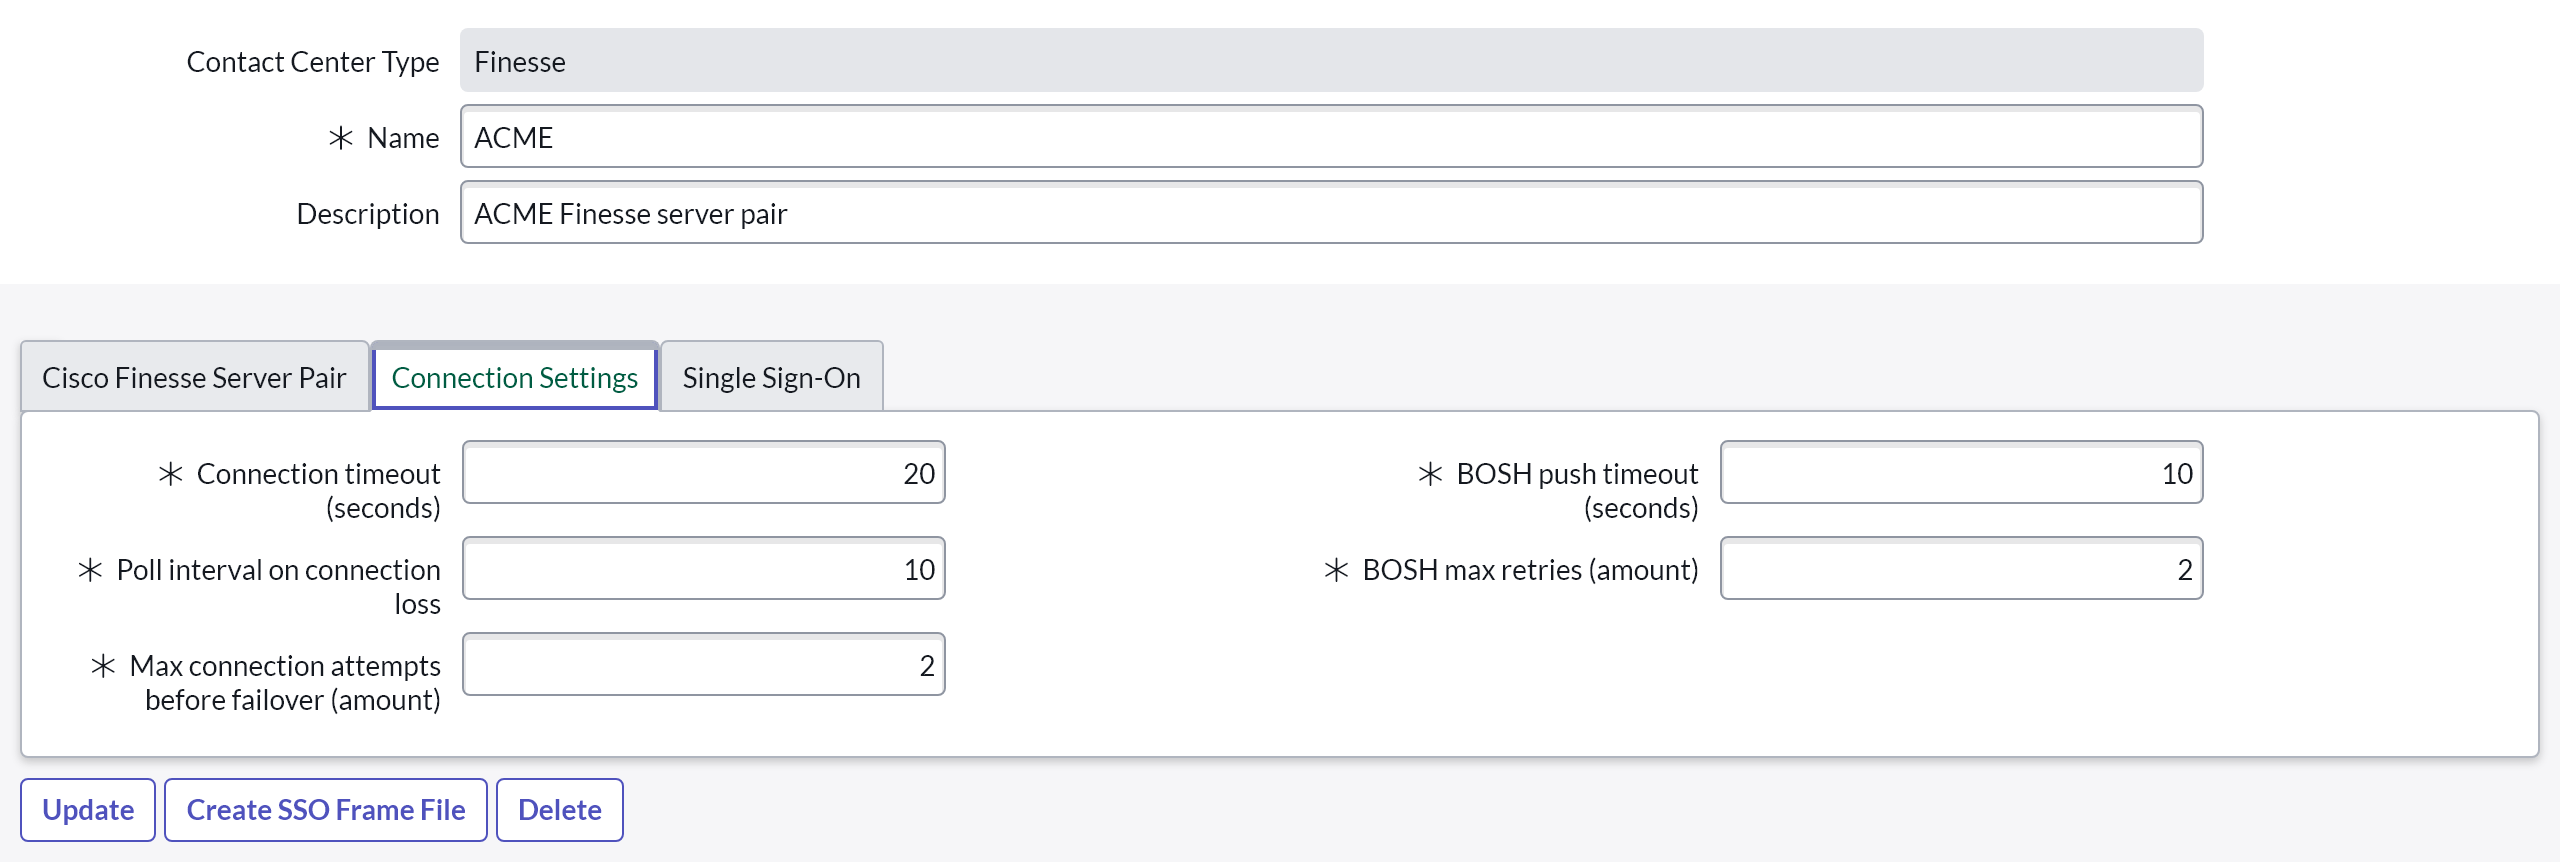
Connection Settings

Connection timeout (seconds)
The maximum number of seconds permitted for a connection attempt to one Finesse server.
Required: Yes
Default value: 20
Poll interval on connection loss
This setting defines the interval (in seconds) before attempting to re-establish the connection, in the event that the connection to Finesse is lost. This procedure repeats until one of the servers (in redundant deployments) can be successfully connected.
Required: Yes
Default value: 10
Max connection attempts before failover (amount)
Defines the maximum number of connection attempts to the Finesse server before trying to connect to the secondary Finesse server.
Required: Yes
Default value: 2
BOSH push timeout (seconds)
Defines the number of seconds to wait for an XMPP Notification Event from Finesse. After the configured number of seconds, the XHR request is canceled and a new one is initiated.
Required: Yes
Default value: 60
Values less than 60 or greater than 120 are reset to the default value of 60.
BOSH max retries (amount)
Networks may drop and connections may be temporarily unavailable. This setting defines the number of ongoing failed BOSH XHR requests before the application considers the connection to be failed.
Required: Yes
Default value: 2
Single Sign-On

Frame Path
The path to the SSO frame file on the Cisco Finesse Server. Keep this blank if Single Sign-On is not used.
Required: No
Default value: Empty
Prerequisites
Ensure that the Call Center is configured for SSO:
- IdP is configured.
- IdS is configured and trust is created with IdP.
- Global SSO mode on administrative workstation is set to Hybrid (supported as of Finesse 12.5) or SSO Only.
- Agents are configured for SSO login.
- The Content Security Policy is enabled on the Finesse Server. See Enable CSP on Finesse Server for more information.
For more information on the configuration please refer to the Cisco SSO guide for CCE or CCX.
Check if the agent can login with SSO on the Cisco Finesse Desktop.
Enable Single Sign-On
In order to make it possible for agents to login via SSO, a file has to be uploaded to the Cisco Finesse Server.
Step 1: On your ServiceNow instance, navigate to b+s Connects for ServiceNow > Finesse Servers and create the SSO Frame File by clicking on the "Create SSO Frame File" button in the upper right corner.
Step 2: Download the created HTML file from the attachements.
Step 3: Open an SFTP (port 22) connection to the Finesse Server (e.g. with FileZilla). See Reset 3rdpartygadget FTP Password in case you have to reset the password.
Step 4: Upload the SSO Frame file to /3rdpartygadget/files/ServiceNow/SSO/.
Step 5: Go to the configuration (b+s Connects for ServiceNow > Finesse Servers > Single Sign-On) and enter /3rdpartygadget/files/ServiceNow/SSO/finesseSSOFrame.html as the Frame Path.
Step 6: Save the configuration.
The html file to download differs for every ServiceNow instance. So make sure multiple files with different names are used in order for you to use multiple instances (e.g. test, pre-prod, prod) with the same Finesse Servers.
Required configuration for Mozilla Firefox
Due to architectural limitations with Cisco Single Sign-On, logging in with Single Sign-On enabled won't work if the JSON-viewer from Mozilla Firefox browser is used. Therefore, all users who use Mozilla Firefox need to change the following configuration in their browser:
Step 1: Enter about:config into the navigation bar of Mozilla Firefox browser.
Step 2: Search for devtools.jsonview.enabled.
Step 3: Select the setting devtools.jsonview.enabled and change its value to false.