New Installation
Harmony Agent Adapter
Copy BucherSuter_HarmonyAgentAdapter-V_4_2_0-SFX.exe to the target server and execute it to copy the files of the Bucher + Suter Harmony Agent Adapter into the following directory:
C:\Program Files\BucherSuter\ConnectsHarmony\HarmonyAgentAdapter
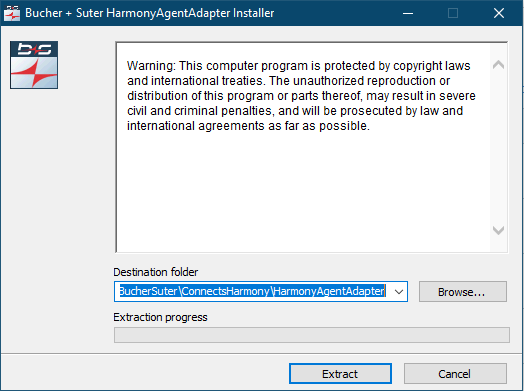
The wizard replaces the files in the selected destination folder with the new files of the self-extractable. This operation is performed without notification to the user.
Configuration
Copy the installed configuration file HarmonyAgentAdapter.ini to the following folder:
C:\ProgramData\BucherSuter\ConnectsHarmony\HarmonyAgentAdapter
Service Setup
To setup the Windows Service for the Bucher + Suter Harmony Agent Adapter execute install_service.bat. Check the HarmonyAgentAdapter.InstallLog for more information about the executed service installation.
To uninstall the Bucher + Suter Harmony Agent Adapter Windows Service execute uninstall_service.bat. Again, check the HarmonyAgentAdapter.InstallLog for more information about the executed service uninstallation.
Administrator privileges are required to execute the batch-files. (Right click and “Run as administrator”).
For testing purposes you may also run the Bucher + Suter Harmony Agent Adapter in console-mode by executing start_console.bat.
Secure communication to Finesse
To secure the communication between the Cisco Finesse server and the Bucher + Suter Harmony Agent Adapter, a certificate that is trusted by the Bucher + Suter Harmony Agent Adapter must be created and uploaded to the Cisco Finesse Server.
Perform the following steps to replace the existing self-signed certificate.
- Login to the Cisco Finesse Server Administration with your Web Browser.
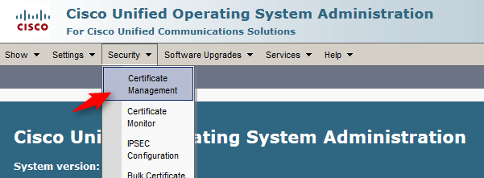
https://<finesseServer>:8443/cmplatform - Select the menu option Cisco Unified OS Administration from the drop-down menu in the upper right-hand corner.

Select the menu item Security - Certificate Management
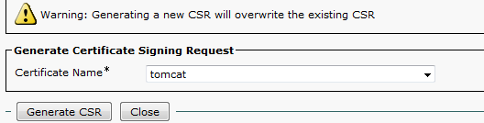
Generate a Certificate Signing Request (CSR) for the tomcat Service to validate the request by a certification authority, either an official one or a company-wide trusted CA.
Upload the root certificate and application certificate you received from your Certification authority to Cisco Finesse Server A (Primary) and B (Secondary).
Restart the services Cisco Finesse Notification Service and Cisco Tomcat via the CLI for a Cisco Finesse server in a CCE deployment or restart the services Cisco Unified UCCX Notifica-tion Service and the Cisco Finesse Tomcat via the CLI for a Cisco Finesse server in a UCCX deployment.
utils service restart <service name>
- Upload the root certificate to the host where Bucher + Suter Harmony Agent Adapter is running.
- Check the validity of the Certificate by accessing the Finesse Agent Desktop from the host where Bucher + Suter Harmony Agent Adapter is running via a Web Browser.
For further information please refer to the official Cisco Finesse Installation and Upgrade Guide
Harmony Workflows
To leverage the Harmony workkflows, copy BucherSuter_HarmonyWorkflows-V_4_2_0.zip to the server where the Harmony Integration Server is installed and extract the files into the following directories (overwrite all existing files in the target directories):
C:\OpenMethods\omis4\workflows\RNA-CiscoUCCEC:\OpenMethods\omis4\workflows\RNA-CiscoUCCX
With current version of Harmony Integration Server, only the folder RNA-CiscoUCCE is used, also for UCCX environments. If you have a UCCX environment, please rename the folder RNA-CiscoUCCE to RNA-CiscoUCCE_orig and then rename the folder RNA-CiscoUCCX to RNA-CiscoUCCE.
Harmony Routing Adapter
Bucher + Suter Harmony Routing Adapter is only required for mail and chat routing. For voice-only and UCCX deployments, only the Bucher + Suter Harmony Agent Adapter is required
Copy BucherSuter_HarmonyRoutingAdapter-V_4_1_1-SFX.exe to the target server and execute it to copy the files of the Bucher + Suter Harmony Routing Adapter into the following directory:
C:\Program Files\BucherSuter\ConnectsHarmony\HarmonyRoutingAdapter
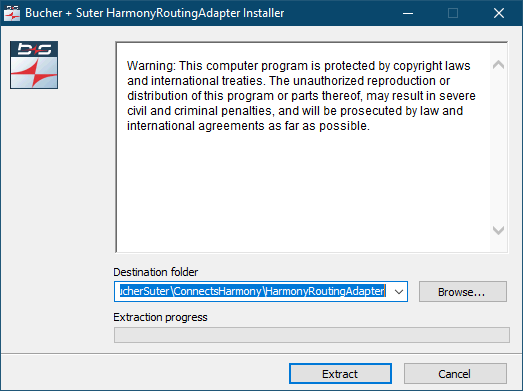
The wizard replaces the files in the selected destination folder with the new files of the self-extractable. This operation is performed without notification to the user.
Configuration
Copy the installed configuration file HarmonyRoutingAdapter.ini to the following folder:
C:\ProgramData\BucherSuter\ConnectsHarmony\HarmonyRoutingAdapter
Service Setup
To setup the Windows Service for the Bucher + Suter Harmony Routing Adapter execute install_service.bat. Check the HarmonyRoutingAdapter.InstallLog for more information about the executed service installation.
To uninstall the Bucher + Suter Harmony Routing Adapter’s Windows execute uninstall_service.bat. Again, check the HarmonyRoutingAdapter.InstallLog for more information about the executed service uninstallation.
Administrator privileges are required to execute the batch-files. (Right click and “Run as administrator”).
For testing purposes you may also run the Bucher + Suter Harmony Routing Adapter in console-mode by executing start_console.bat.
CCE Universal Queue
To leverage multi channel routing through Cisco's Universal Queue, please refer to CCE Routing with Universal Queue
Other components
Please refer to Openmethods' documentation for detailed installation instructions of Harmony Config Server, Harmony Integration Server and Harmony Queue Adapter.
MediaRoutingPlugin
The MediaRoutingPlugin is a DLL that is used by the Harmony QueueAdapter as a custom DLL for Outbound communication encapsulated in the file bsMediaRoutingPlugin.dll that can be found in the Bucher + Suter Harmony Routing Adapter’s installation directory. The bsMediaRouting-Plugin.dll-file must be moved into the installation directory of the QueueAdapter component.
Harmony MediaBar
To properly install the MediaBar, launch the Oracle RightNow Client and log in with the addins manager (om_addins_admin).
After the RightNow Client has launched, go to the Settings on the bottom left and click on the arrow, then select Configuration
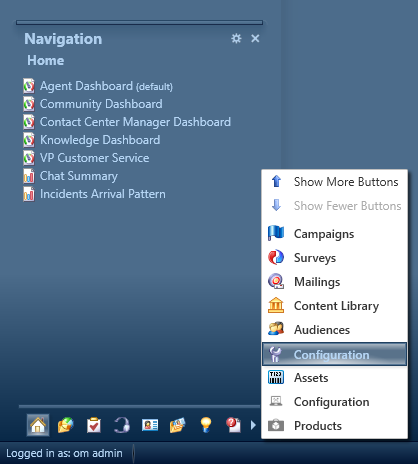
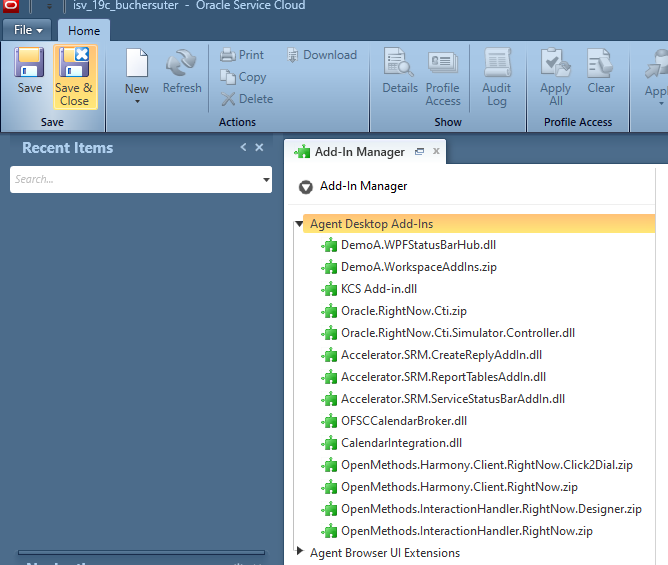
Open the folder Site Configuration and then select the Add-In Manager

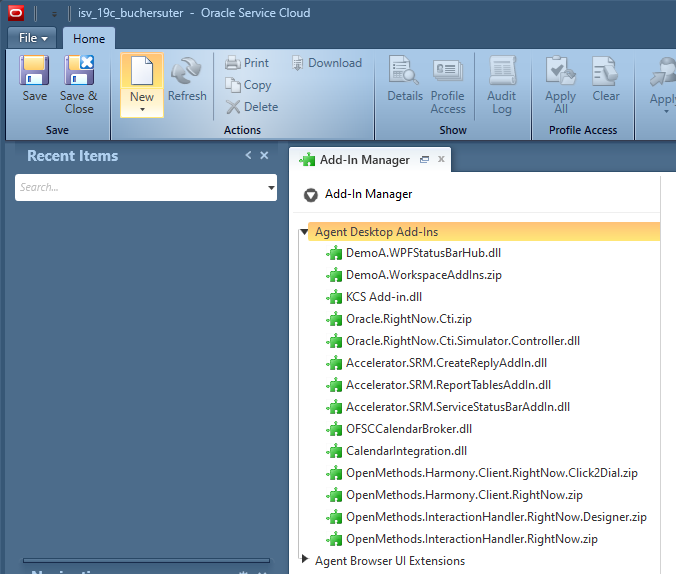
Next you will need to upload the 4 following Add-Ins: OpenMethods.Harmony.Client.RightNow.zip, OpenMethids.Harmony.Client.RightNow.Click2Dial.zip, OpenMethids.InteractionHandler.RightNow.Designer.zip and OpenMethods.InteractionHandler.RightNow.zip
You can do so by selecting Agent Desktop Add-Ins and then clicking New in the MenuBar at the top. A prompt will open and you will be able to choose the Add-In you want to add.
When you uploaded all 4 Add-Ins, click Save & Close to Save the changes. Now you have successfully installed the MediaBar