Power Apps
Cloud Flows
Cloud Flows (Power Automate) make it possible to perform one or more tasks automatically when triggered by an event. In order to familiarize yourself with cloud flows please refer to the official Microsoft documentation.
If the Cloud Flow is not triggered, please consult the troubleshooting guide provided by Microsoft. Please verify that the admin mode is turned off otherwise Cloud Flows are not triggered at all.
A similar experience might be achieved by utilizing classic Microsoft Dataverse workflows, please refer to the official Microsoft documentation
This page outlines practical examples on how to cover common business requirements in conjunction with b+s Connects.
Create a new Cloud Flow
Step 1: Go to https://make.powerapps.com.
Step 2: Navigate to Flow section.
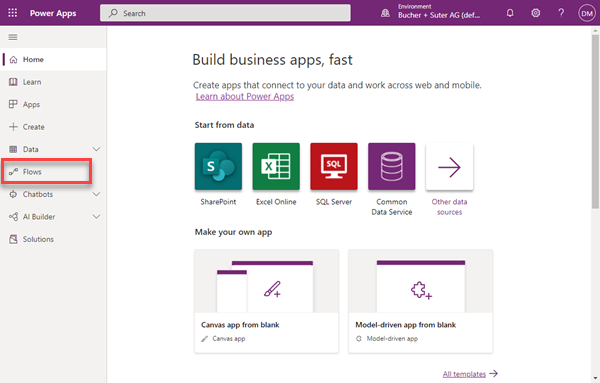
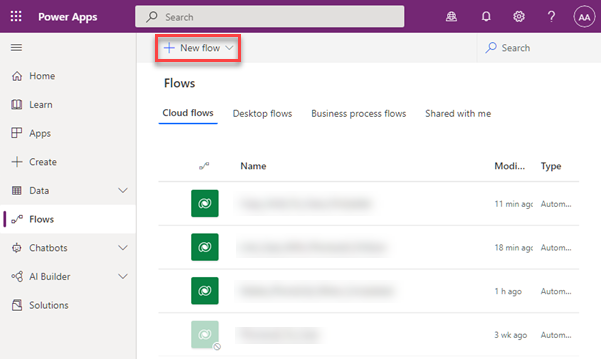
Step 3: Select New flow.
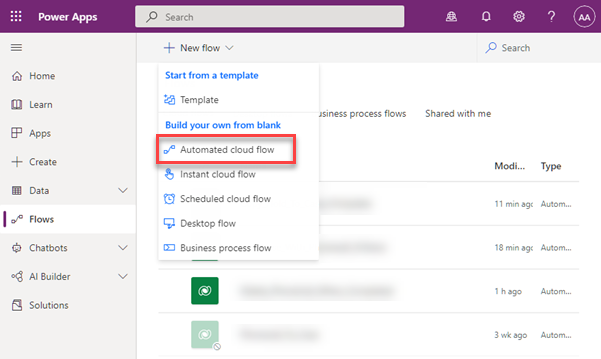
Step 4: Click on Automated cloud flow.
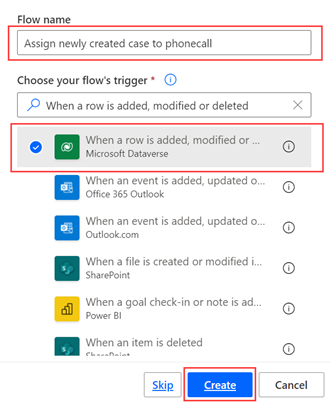
Step 5: Provide a Flow name, choose flow trigger: "When a row is added, modified or deleted" and create the flow.
Step 6: Go on with one of these Flows:
- Delete phonecall record after call has ended
- Assign newly created case to phonecall
- Copy call data from phonecall to case
Delete phonecall record after call has ended
For each phone call that is handled by the agent, a phonecall record is created. The phonecall record serves as a data container throughout the duration of the call. For integrations that do not need to keep the phone call records in the CRM database can delete them automatically as follows:
Prerequisites
- Service Layout setting
Enable autocomplete call logchecked. - A new Flow is created.
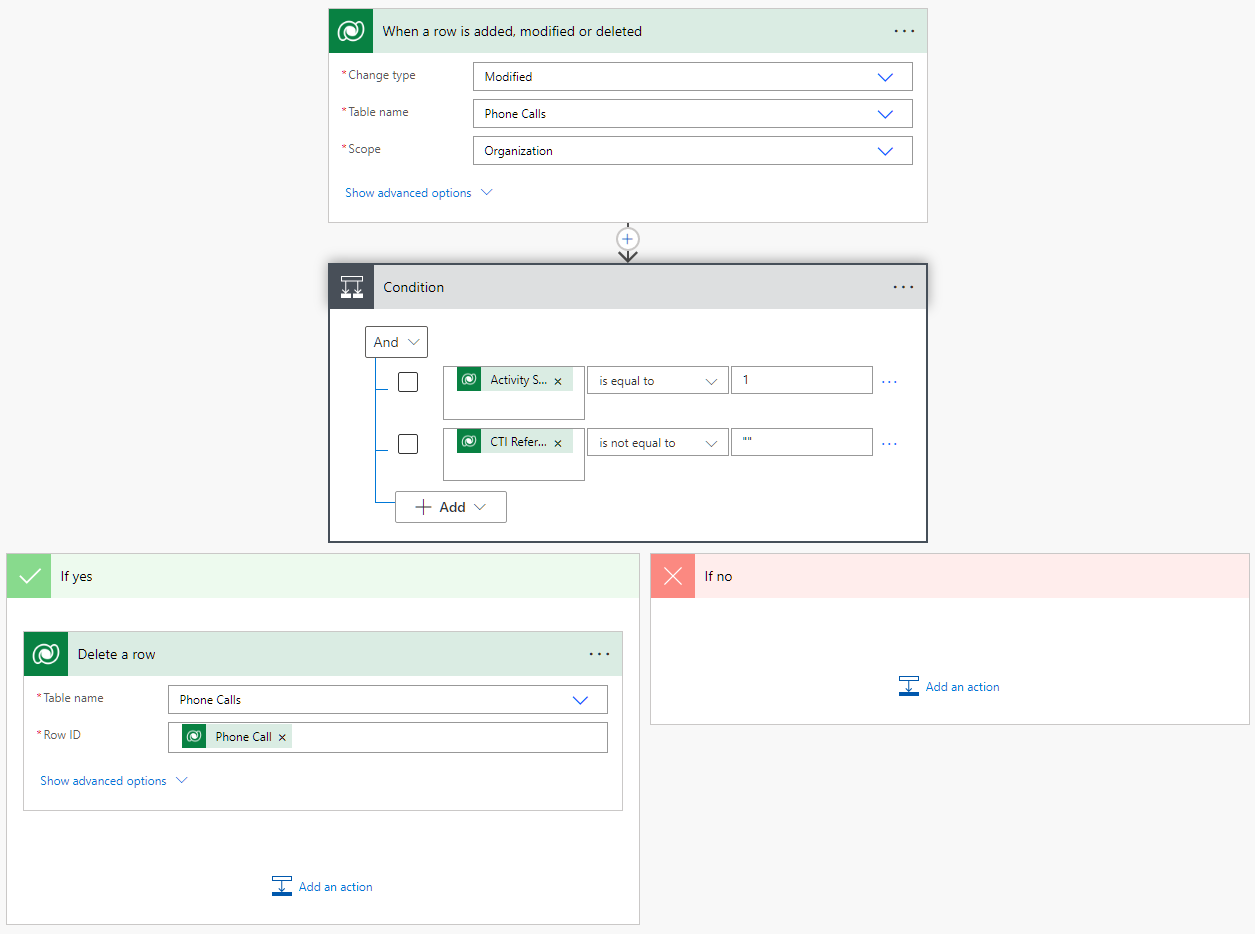
Cloud Flow example
| Action | Data |
|---|---|
| Trigger: When a row is added, modified or deleted | Change type: Modified Table name: Phone Calls Scope: Organization |
| Condition (And) | Activity Status (statecode) is equal to 1CTI Reference Id (cnx_ctireferenceid) is not equal to "" |
| If yes: Delete a row | Table name: Phone Calls Row ID: Phone Call (activityid) |
Assign newly created case to phonecall
The same unique identifier must be saved to both the phonecall record and the newly created case. The case will be assigned to the regarding field of the phonecall record.
Prerequisites
- Custom column added on Case (e.g. cr661_ctireferenceid) to store the unique identifier.
- Service Layout configuration: Create new case populates the workitemid to the custom field. For more details refer to the Create New Case configuration instructions.
- A new Flow is created.
Cloud Flow example

| Action | Data |
|---|---|
| Trigger: When a row is added, modified or deleted | Change type: Added Table name: Cases Scope: Organization |
| List rows | Table name: Phone Calls Filter rows: cnx_ctireferenceid eq 'CTI Reference ID' (cr661_ctireferenceid) Row count: 1 |
| Apply to each | Select an output from previous steps: value (List of Items) |
| Update a row | Table name: Phone Calls Row ID: Phone Call (activityid)Regarding (Cases): /incidents(Case) (incidentid) |
Copy call data from phonecall to case
Prerequisites
- Custom column added on Case (e.g. cr661_durationonhold) to store the hold duration.
- Case is linked to the phonecall regarding field automatically when added (i.e. saved). Use the "Assign newly created case to phonecall" example to achieve automatic assignment.
- A new Flow is created.
Cloud Flow example

| Action | Data |
|---|---|
| Trigger: When a row is added, modified or deleted | Change type: Modified Table name: Phone Calls Scope: Organization Select columns: cnx_durationonhold |
| List rows | Table name: Cases Filter rows: cr661_ctireferenceid eq 'CTI Reference Id'(cnx_ctireferenceid)Row count: 1 |
| Apply to each | Select an output from previous steps: value (List of Items) |
| Update a row | Table name: Cases Row ID: Case (incidentid)Duration on Hold: Duration on Hold (cnx_durationonhold) |
Delete saved extension from Connects Agent
Deletes the auto filled in extension in the login page of Connects for Microsoft Dynamics
Prerequisites
- A new Flow is created.
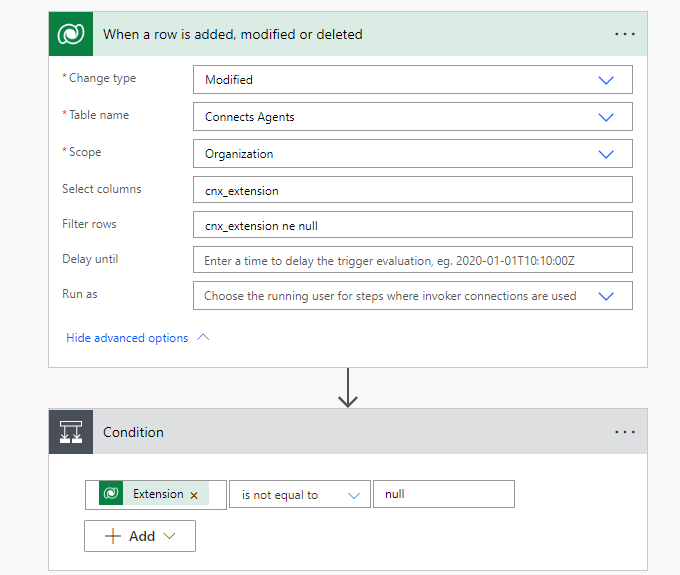
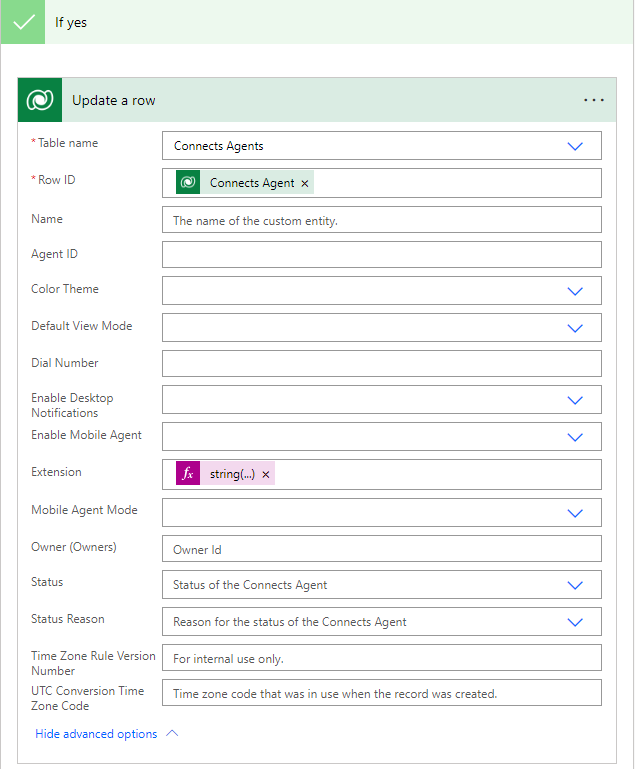
Cloud Flow example
| Action | Data |
|---|---|
| Trigger: When a row is added, modified or deleted | Change type: Modified Table name: Connects Agents Scope: Organization Select columns: cnx_extension Filter rows: cnx_extension ne null |
| Condition | Extension is not equal to null |
| If yes: Update a row | Table name: Connects Agents Row ID: Connects Agent (unique identifier for entity instances)Extension: Expression string(null) |
Add a file to a solution
Step 1: Go to https://make.powerapps.com.
Step 2: Navigate to Solutions section.
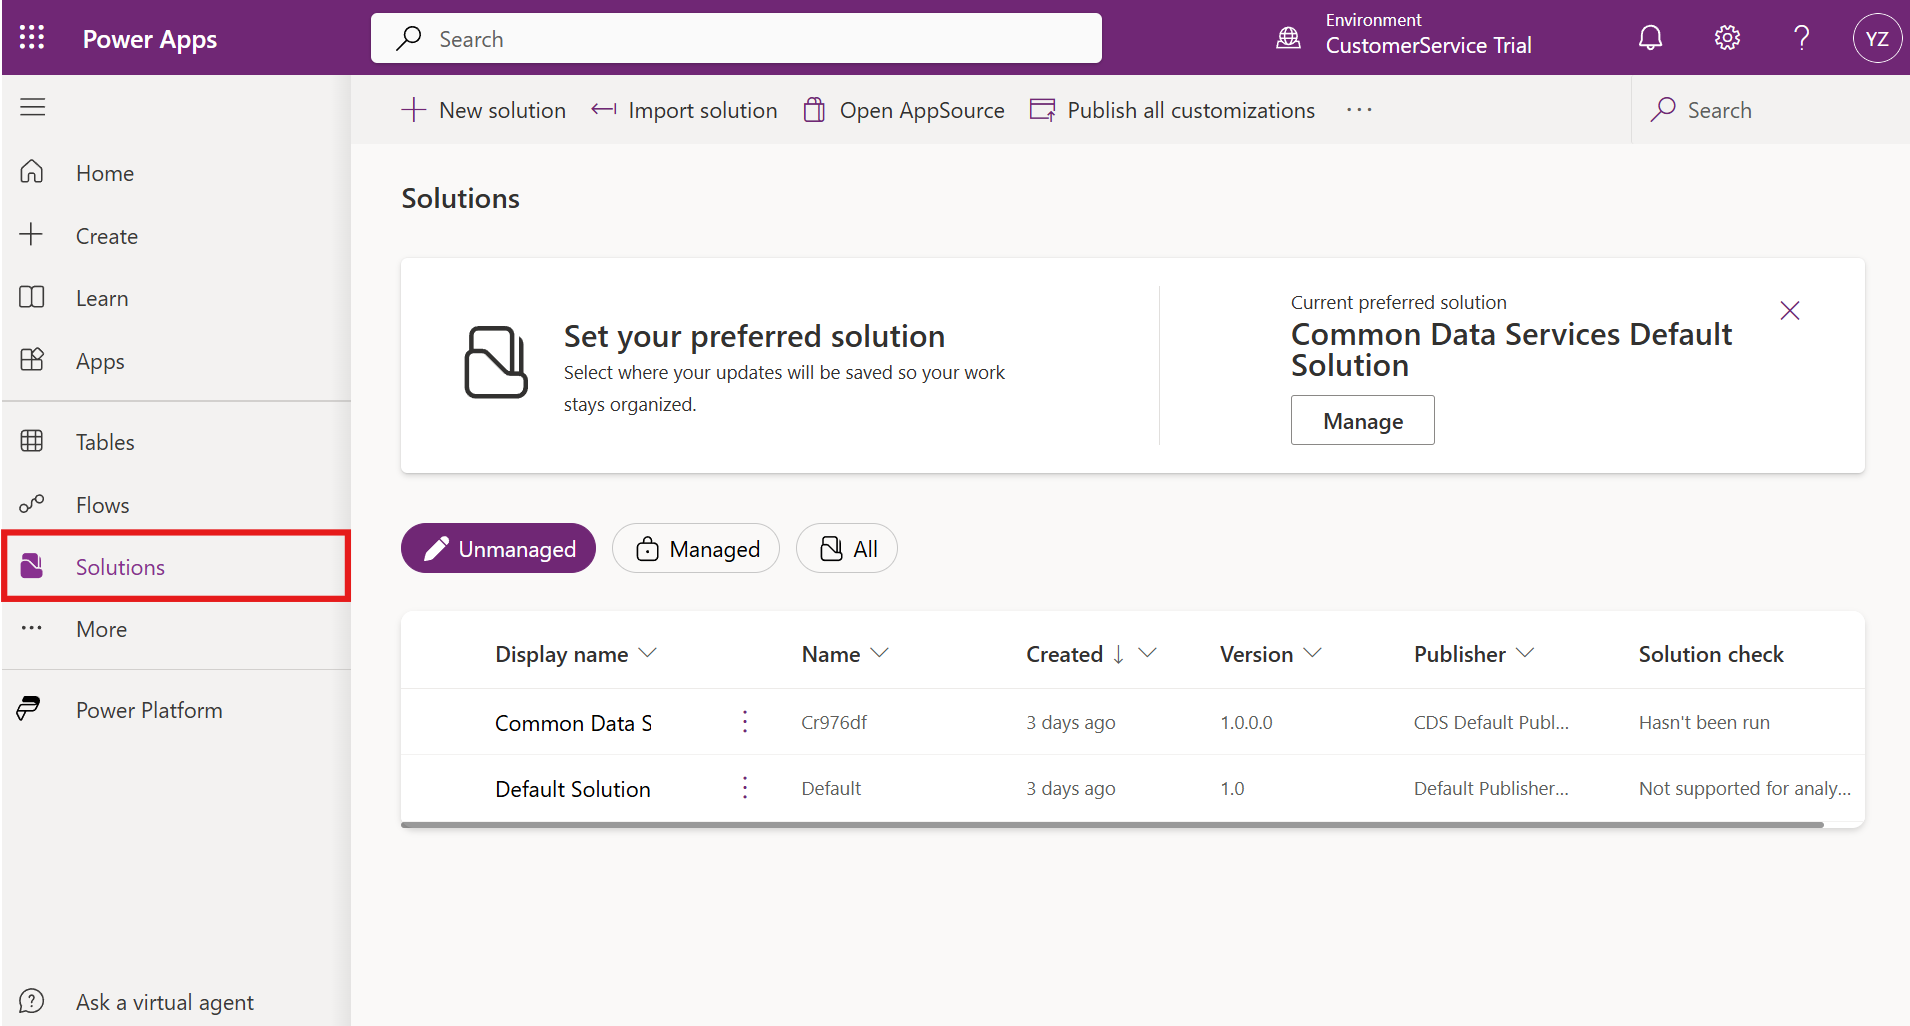
Step 3: Open or create a solution.
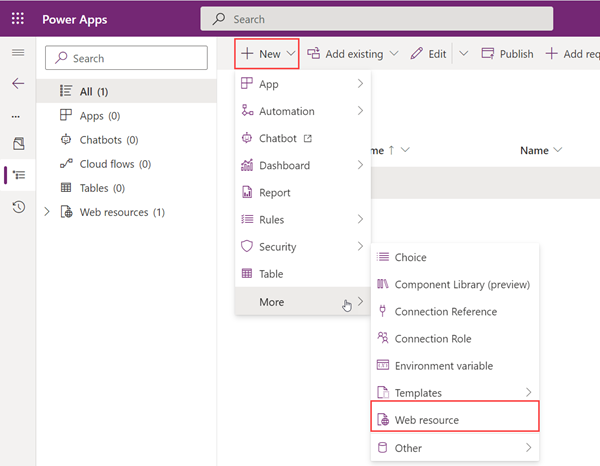
Step 4: Create a new web resource.
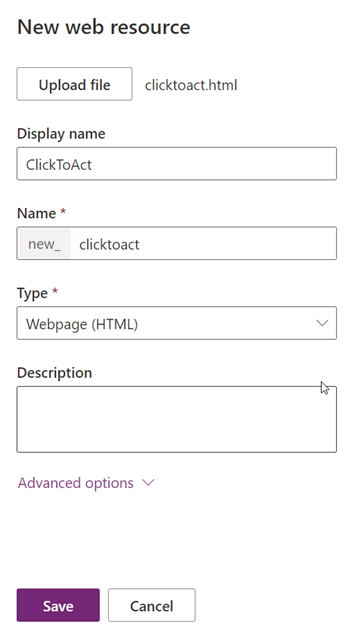
Step 5: Upload the file, enter the display name, name and type of the file and save it.
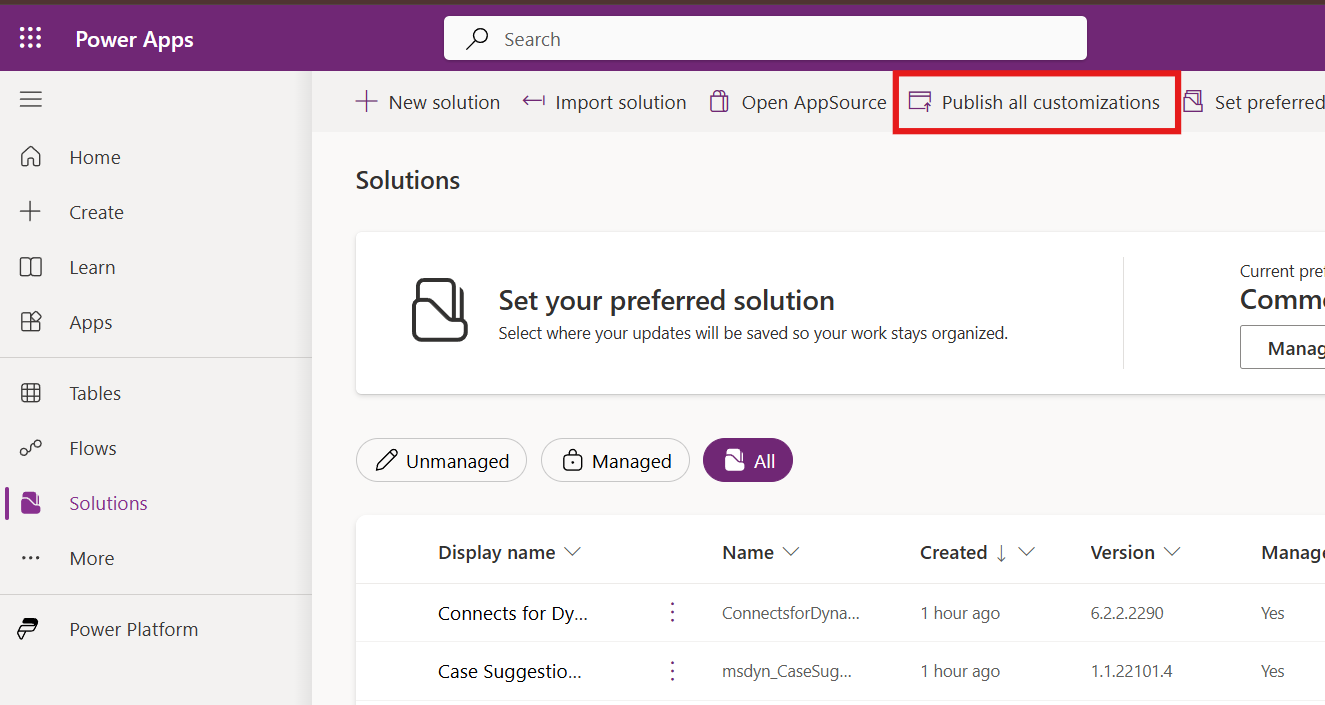
Step 6: Make sure to publish all customizations.
Add a column to a table
Step 1: Go to https://make.powerapps.com.
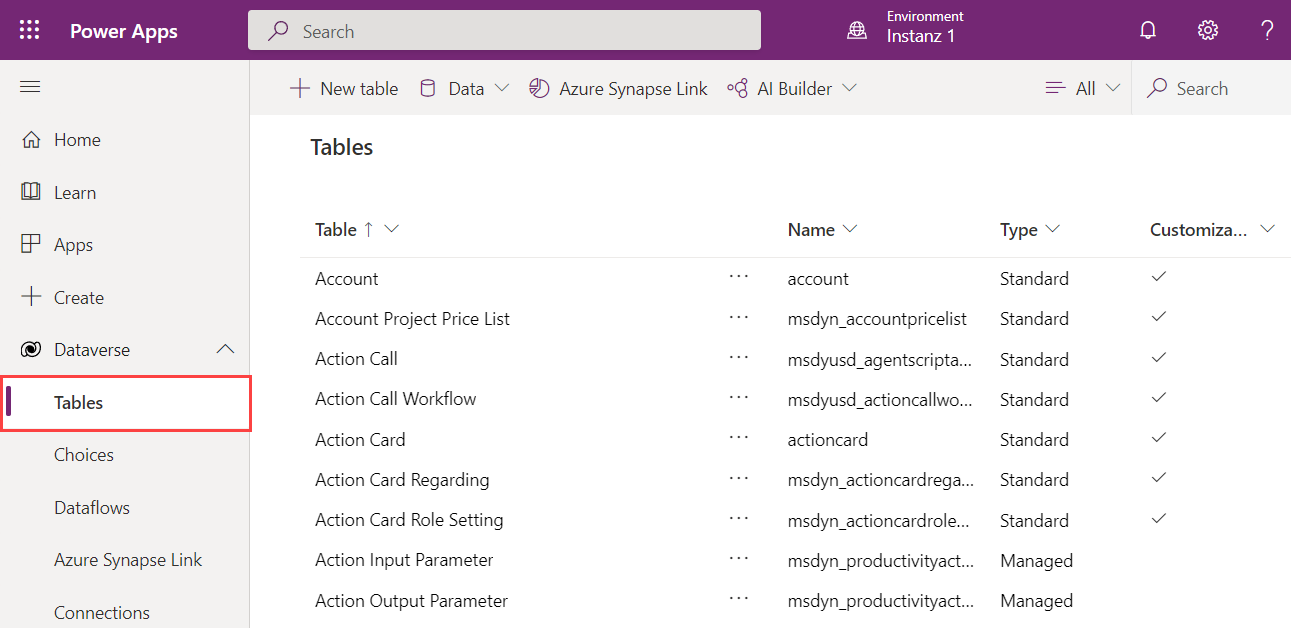
Step 2: Expand the Dataverse section and open Tables.
Step 3: Search for the table (e.g. Case, Account...) to be modified and open it.
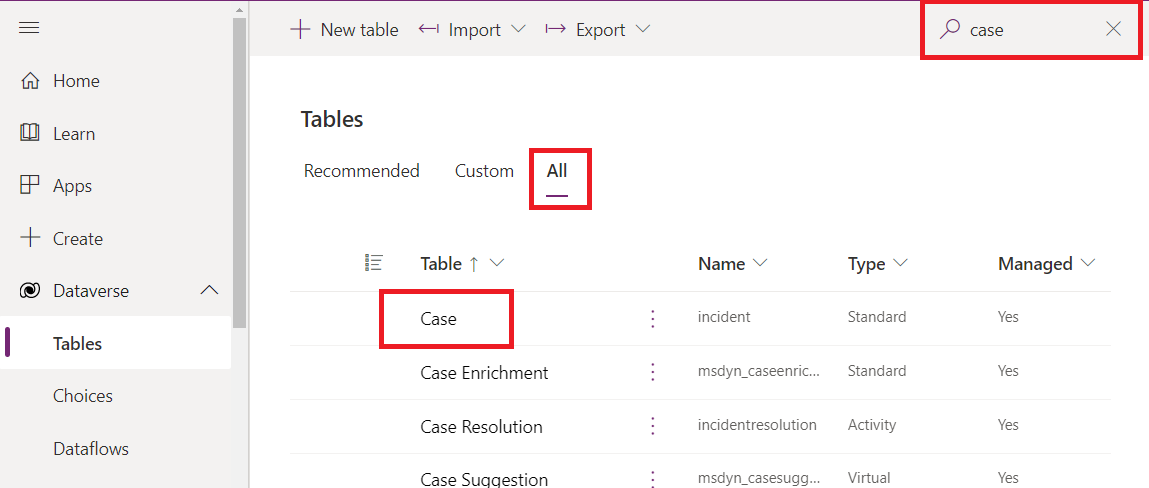
Step 4: Add a new column.

Step 5: Enter a Display Name, a Schema Name and click Save.
