Installation for USD
This guide describes how to integrate the b+s Connects for Microsoft Dynamics in the CRM and the few steps to have it up and running.
Further information and options can be found in the USD Configuration Guide.
Prerequisites
Cisco CCE/CCX is ready for use, and agents are able to login and receive calls using the Finesse Agent Desktop.
CORS needs to be enabled on the Finesse Server. Additional information can be found here.
Admin access to the target Dynamics instance is granted.
Access to Power Apps, Microsoft 365 admin center and Power Platform admin center.
Licenses for b+s Connects are assigned to your tenant.
The newest Package Deployer from Microsoft is installed and Unified Service Desk - Unified Interface Package is deployed.
For more information please refer to the official documentation on the Microsoft website.Unified Service Desk 4.1 or higher is installed on the agent workstation.
For more information please refer to the official documentation on the Microsoft website.The Channel Integration Framework has to be installed in your Dynamics instance.
To check if the framework is installed open the Apps overview and locate Channel Integration Framework.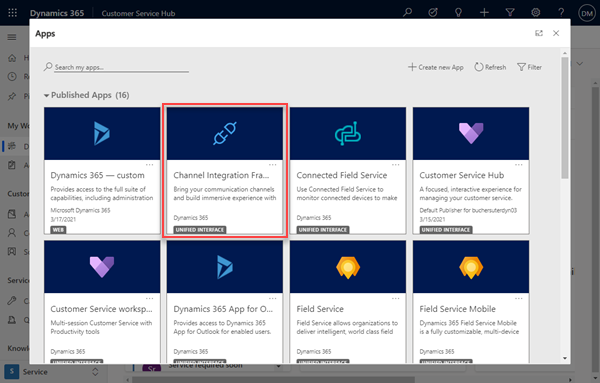
If the framework is not yet installed follow the installation steps outlined on the official documentation to install it.
Install b+s Connects for Microsoft Dynamics
If b+s Connects is already installed for Web Client you can skip this chapter and go on with Configure Channel Integration Framework.
Step 1: Go to https://admin.microsoft.com.
Step 2: Navigate to Licenses in the Billing section and open your license of b+s Connects for Microsoft Dynamics.
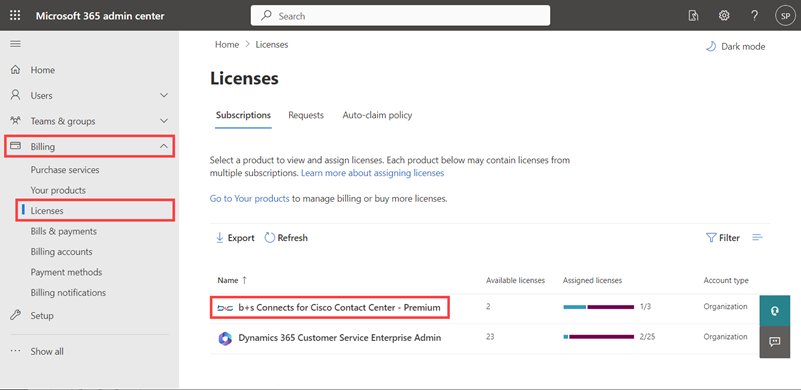
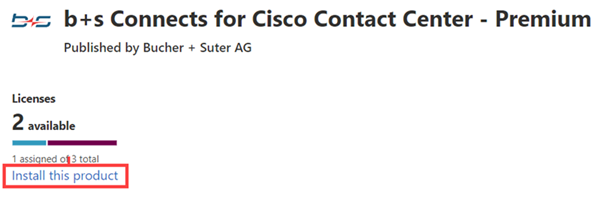
Step 3: Click "Install this product".
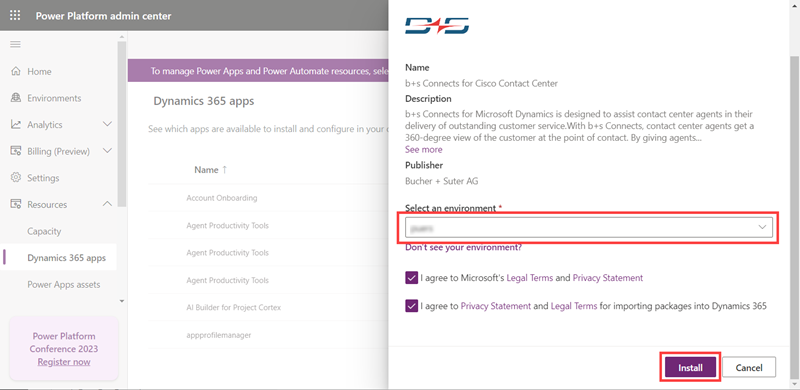
Step 4: Select your environment and start the installation.
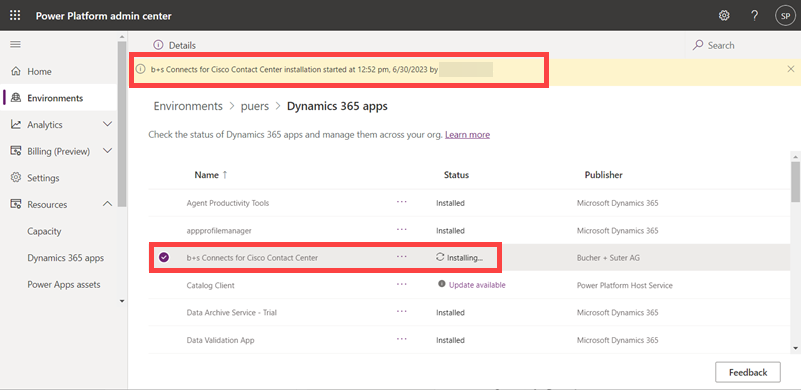
Step 5: A notification with the installation status is displayed.
Configure Channel Integration Framework
Step 1: Navigate to Unified Service Desk Administrator.

Step 2: Navigate to Hosted Controls.
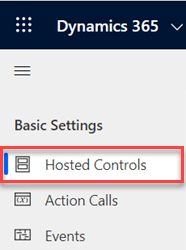
Step 3: Create a Hosted Control.

Step 4: Specify the following values.
| Property | Value |
|---|---|
| Name | bsConnects |
| Display Name | b+s Connects for Dynamics |
| Unified Service Desk Component Type | Channel Integration Framework |
| Hosting Type | Chrome Process |
| Channel URL: | https://<yourorg>.crm<num>.dynamics.com/WebResources/cnx_index.html |
| Application is Global | checked |
| Display Group | RightPanel |
| Application is Dynamic | No |
Step 5: Click Save to keep your changes.
Configure Dashboard
Step 1: Navigate to Hosted Controls.

Step 2: Search and open "Dashboard".

Step 3: Specify the following properties.
| Property | Value |
|---|---|
| Unified Service Desk Component Type | Unified Interface Page |
| Hosting Type | Chrome Process |
| Application is Global | checked |
| Display Group | MainPanel |
| Application is Dynamic | No |
Step 4: Click Save to keep your changes.
Configure Global Browser Mode
Step 1: Navigate to Options.
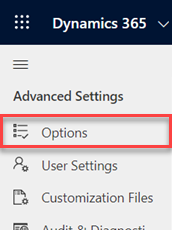
Step 2: Search for "GlobalBrowserMode" and open it or create a new option.

Step 3: Adjust the following properties.
| Property | Value |
|---|---|
| Global Option | Others |
| Name | GlobalBrowserMode |
| Value | Chrome |
Step 4: Click Save to keep your changes.
Configure Action Calls
Step 1: Navigate to Action Calls.
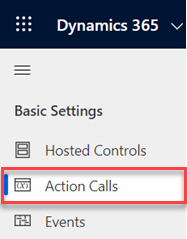
Step 2: Search and open "Get environment for CIF".

Step 3: Adjust the following properties.
| Property | Value |
|---|---|
| Hosted Control | Dashboard |
| Action | RunXrmCommand |
| Data | webResourceName=cnx_CIFXrmCommands.jsfunctionName=getEnvironment |
Step 4: Click Save to keep your changes.
Step 5: Navigate to Action Calls.
Step 6: Search and open "Get Entity Metadata for CIF".
Step 7: Adjust the following properties, save your changes and navigate to Action Calls.
| Property | Value |
|---|---|
| Hosted Control | Dashboard |
| Action | RunXrmCommand |
| Data | webResourceName=cnx_CIFXrmCommands.jsfunctionName=getEntityMetadata |
Step 8: Search and open "Retrieve record for CIF".
Step 9: Adjust the following properties, save your changes and navigate to Action Calls.
| Property | Value |
|---|---|
| Hosted Control | Dashboard |
| Action | RunXrmCommand |
| Data | webResourceName=cnx_CIFXrmCommands.jsfunctionName=retrieveRecord |
Step 10: Search and open "Create record for CIF control".
Step 11: Adjust the following properties, save your changes and navigate to Action Calls.
| Property | Value |
|---|---|
| Hosted Control | Dashboard |
| Action | RunXrmCommand |
| Data | webResourceName=cnx_CIFXrmCommands.jsfunctionName=createRecord |
Step 12: Search and open "Update record from CIF".
Step 13: Adjust the following properties, save your changes and navigate to Action Calls.
| Property | Value |
|---|---|
| Hosted Control | Dashboard |
| Action | RunXrmCommand |
| Data | webResourceName=cnx_CIFXrmCommands.jsfunctionName=updateRecord |
Step 14: Search and open "Delete record from CIF".
Step 15: Adjust the following properties, save your changes and navigate to Action Calls.
| Property | Value |
|---|---|
| Hosted Control | Dashboard |
| Action | RunXrmCommand |
| Data | webResourceName=cnx_CIFXrmCommands.jsfunctionName=deleteRecord |
Step 16: Search and open "Search and open records for CIF".
Step 17: Adjust the following properties, save your changes and navigate to Action Calls.
| Property | Value |
|---|---|
| Hosted Control | Dashboard |
| Action | RunXrmCommand |
| Data | webResourceName=cnx_CIFXrmCommands.jsfunctionName=retrieveMultipleAndOpenRecords'bsConnects' |
Step 18: Search and open "Open form for CIF".
Step 19: Adjust the following properties and save your changes.
| Property | Value |
|---|---|
| Hosted Control | Dashboard |
| Action | RunXrmCommand |
| Data | webResourceName=cnx_CIFXrmCommands.jsfunctionName=openForm |
Step 20: Search and open "Load dashboard".
Step 21: Adjust the following properties and save your changes.
| Property | Value |
|---|---|
| Hosted Control | Dashboard |
| Action | Navigate |
| Data | url=/main.aspx?pagetype=dashboard&id=DEAA7F5F-0130-E311-87F2-00155DD8D60BHideNavigationBar = True |
Step 22: Create a new action call.
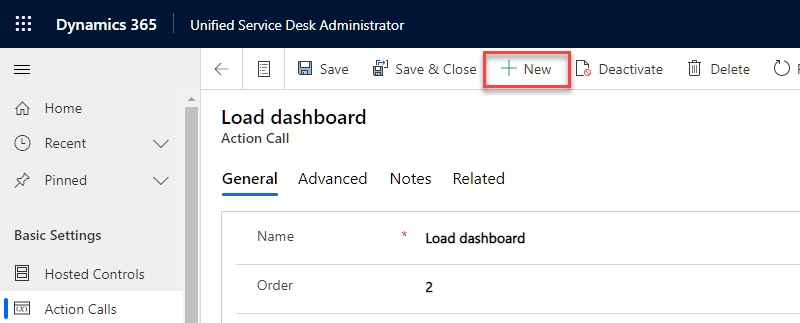
Step 23: Provide the following properties and save your changes.
| Property | Value |
|---|---|
| Name | Reload CIF |
| Hosted Control | bsConnects |
| Action | RunScript |
| Data | frameWindow.location.reload(); |
Configure Events
Step 1: Navigate to Events.
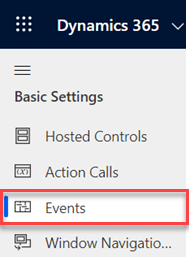
Step 2: Search and open "GetEnvironment".

Step 3: Adjust the following properties.
| Property | Value |
|---|---|
| Hosted Application | bsConnects |
| Active Actions | Get environment for CIF |
Step 4: Click Save to keep your changes.
Step 5: Navigate to Events.
Step 6: Search and open "GetEntityMetadata".
Step 7: Adjust the following properties, save your changes and navigate to Events.
| Property | Value |
|---|---|
| Hosted Application | bsConnects |
| Active Actions | Get Entity Metadata for CIF |
Step 8: Search and open "RetrieveRecord".
Step 9: Adjust the following properties, save your changes and navigate to Events.
| Property | Value |
|---|---|
| Hosted Application | bsConnects |
| Active Actions | Retrieve record for CIF |
Step 10: Search and open "CreateRecord".
Step 11: Adjust the following properties, save your changes and navigate to Events.
| Property | Value |
|---|---|
| Hosted Application | bsConnects |
| Active Actions | Create record for CIF control |
Step 12: Search and open "UpdateRecord".
Step 13: Adjust the following properties, save your changes and navigate to Events.
| Property | Value |
|---|---|
| Hosted Application | bsConnects |
| Active Actions | Update record from CIF |
Step 14: Search and open "DeleteRecord".
Step 15: Adjust the following properties, save your changes and navigate to Events.
| Property | Value |
|---|---|
| Hosted Application | bsConnects |
| Active Actions | Delete record from CIF |
Step 16: Search and open "SearchAndOpenRecords".
Step 17: Adjust the following properties, save your changes and navigate to Events.
| Property | Value |
|---|---|
| Hosted Application | bsConnects |
| Active Actions | Search and open records for CIF |
Step 18: Search and open "OpenForm".
Step 19: Adjust the following properties and save your changes.
| Property | Value |
|---|---|
| Hosted Application | bsConnects |
| Active Actions | Open form for CIF |
Step 20: Search and open "DesktopReady".
Step 21: Adjust the following properties and save your changes.
| Property | Value |
|---|---|
| Hosted Application | CRM Global Manager |
| Active Actions | Load dashboard |
Step 22: Create a new event.
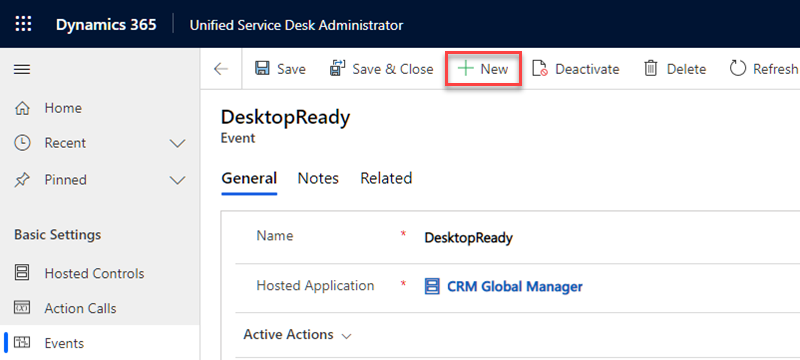
Step 23: Provide the following properties and save your changes.
| Property | Value |
|---|---|
| Name | BrowserDocumentComplete |
| Hosted Application | bsConnects |
Step 24: Adjust the following property and save your changes.
| Property | Value |
|---|---|
| Active Actions | Reload CIF |
If startup behavior is not consistent defer execution of Reload CIF.
Configure Window Navigation Rules
My Agent Settings
Step 1: Navigate to Hosted Controls.

Step 2: Create a Hosted Control.

Step 3: Specify the following values.
| Property | Value |
|---|---|
| Name | bsConnects Agent Settings |
| Display Name | My Agent Settings |
| Unified Service Desk Component Type | Unified Interface Page |
| Hosting Type | Chrome Process |
| Pre-Fetch Data | checked |
| Allow Multiple Pages | No |
| Application is Global | not checked |
| Display Group | MainPanel |
| Adapter | Use No Adapter |
| Application is Dynamic | Yes |
| User can Close | not checked |
Step 4: Click Save.
Step 5: Navigate to Window Navigation Rules.
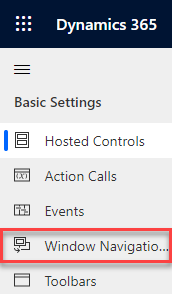
Step 6: Create a Window Navigation Rule.

Step 7: Create an Entity Type Mapping.
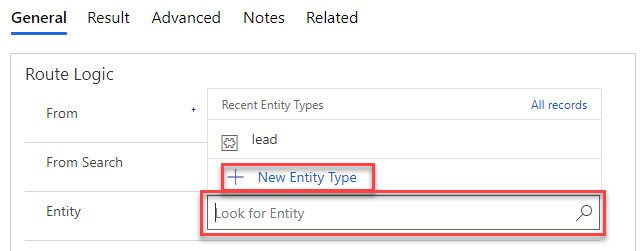
Step 8: Set the name to "cnx_connectsagent", click Save and go back to the Window Navigation Rule.
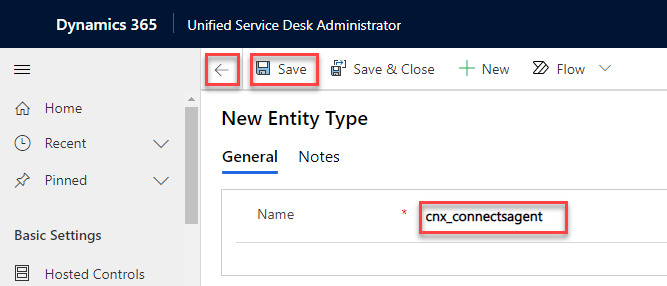
Step 9: Adjust the following properties.
| Property | Value |
|---|---|
| Name | Default bsConnects Agent |
| Order | 200 |
| Entity | cnx_connectsagent |
Step 10: Go to the Result tab and adjust the following properties.

| Property | Value |
|---|---|
| Route Type | Popup |
| Action | Route Window |
| Destination | Tab |
| Target Tab | bsConnects Agent Settings |
| Show Tab | bsConnects Agent Settings |
| Hide Command Bar | No |
| Hide Navigation Bar | Yes |
Step 11: Click Save to keep your changes.
Configure Finesse Server
Finesse Server configuration entries are records that contain the URL and the HTTP and XMPP Port to a Finesse Server. These records are used to assign an agent to a Finesse server. To create a new record follow these steps:
Step 1: Navigate to b+s Connects for Cisco Contact Center.
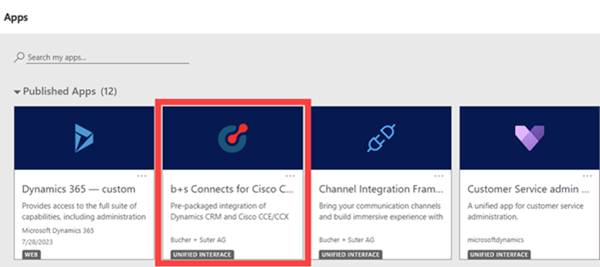
Step 2: Navigate to the Contact Centers and add a new configuration.
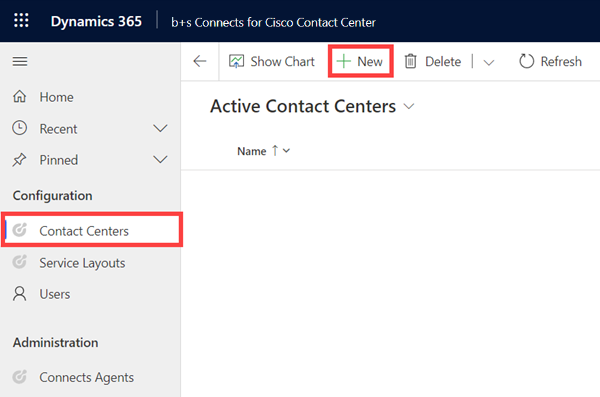
Step 3: Enter a name, the Finesse server URL in the format https://name.domain and readjust the HTTP and XMPP Ports if needed.
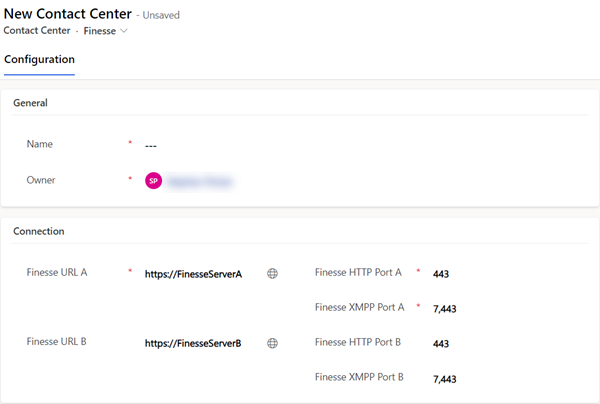
Step 4: Click Save to keep your changes.
For a full description of all fields refer to the Finesse Configuration Guide.
Configure Service Layout
Service Layouts manage the Agent Desktop (Gadget) behavior. For example: which records should be queried in Dynamics to identify a caller, or how phone numbers should be translated.
This type of configuration is used to describe the service being offered to clients. To create a new record follow these steps:
Step 1: Navigate to b+s Connects for Cisco Contact Center.

Step 2: Navigate to the Service Layout and add a new configuration.
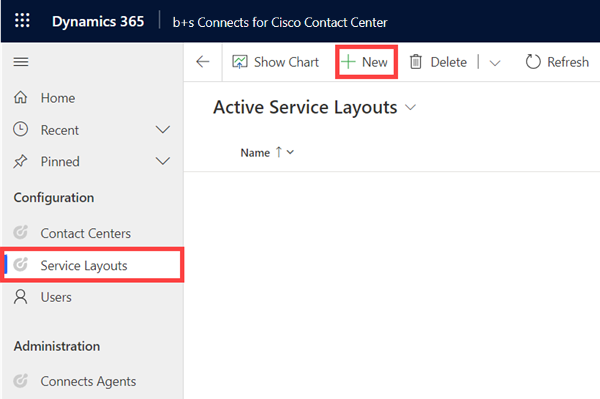
Step 3: Enter a descriptive name for the Service Layout.

Step 4: Click Save to keep your changes.
For additional information please refer to the Service Layout guide.
Configure Dynamics User
In order to use b+s Connects for Dynamics each Dynamics user needs to have a Finesse Server and Service Layout entry configured. Follow the steps below to assign the entries to the Dynamics user.
Step 1: Navigate to b+s Connects for Cisco Contact Center.

Step 2: Navigate to Users.
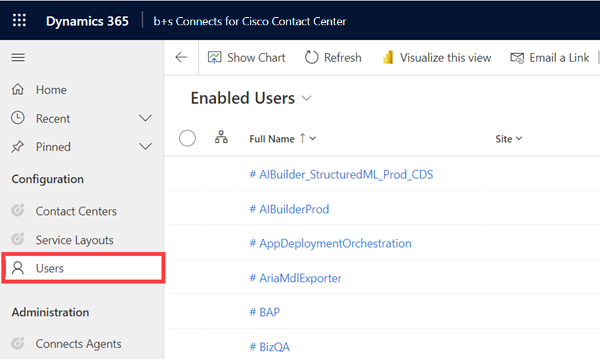
Step 3: Expand System Views to select the desired user view (e.g. Enabled Users).
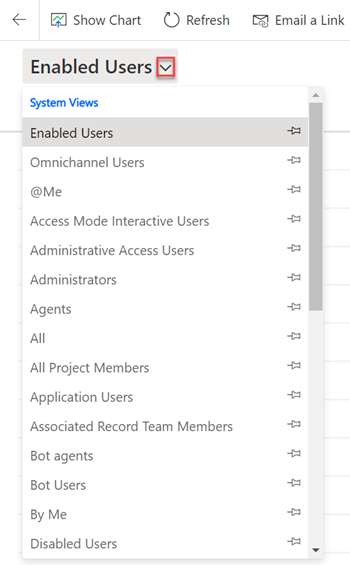
Step 4: Select a user.
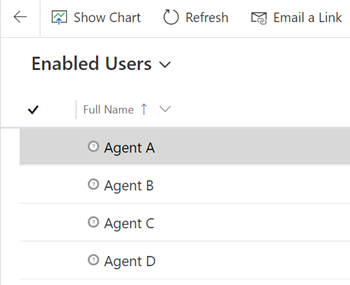
Step 5: Select tab Connects for Cisco Contact Center MSD - Configuration.
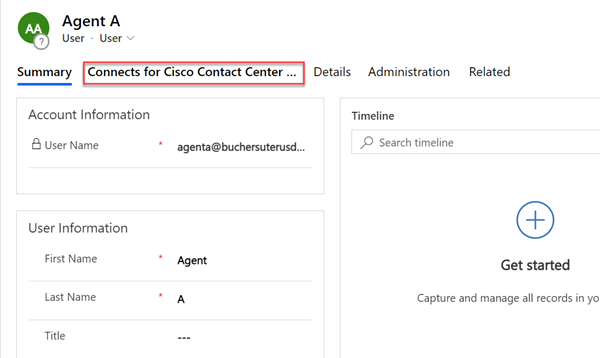
Step 6: Search for and select your Contact Center configuration.

Step 7: Search for and select your Service Layout configuration.

Step 8: Click Save to keep your changes.
Assign Roles to User
To grant permission for a user to access b+s Connects for Dynamics, assign the role "Connects Agent" or "Connects Administrator". Follow the steps below to manage the roles for users.
To grant permission for a user to access b+s Connects for Dynamics, assign the role "Connects Agent" or "Connects Administrator". Follow the steps below to manage the roles for users.
Step 1: Go to https://admin.powerplatform.microsoft.com.
Step 2: Navigate to Environments.
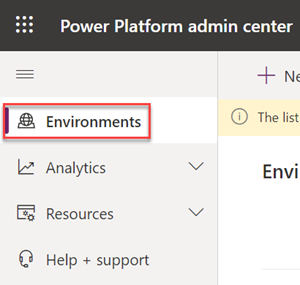
Step 3: Click your environment to edit.

Step 4: Display the security roles.
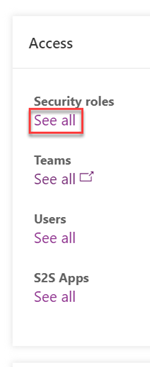
Step 5: Go to the "Connects ..." roles.
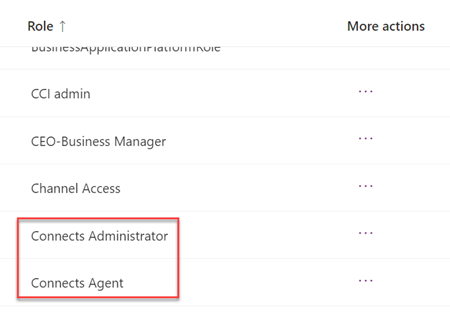
Step 6: Select the role "Connects Agent".
Step 7: Open "Members".

Step 8: Add users.
Step 9: Search for the user entry and click on it.
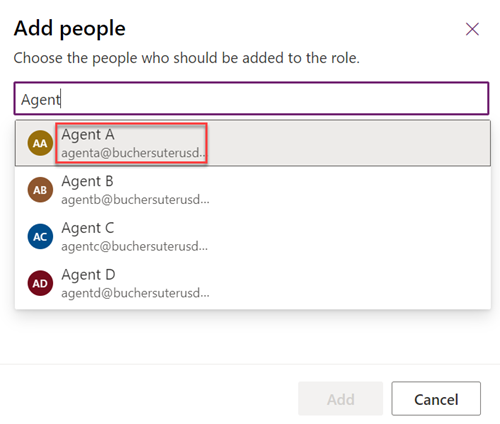
Step 10: Repeat step 9 to add more users.
Step 11: Add the selected users.
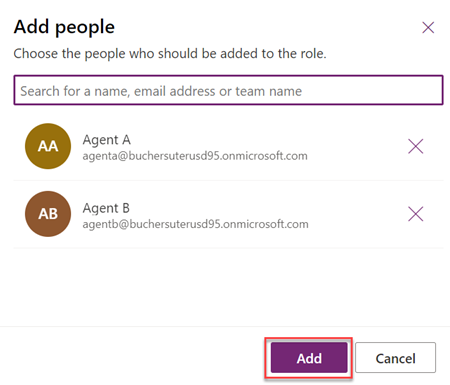
Step 12: Repeat steps 6 to 11 to assign users to the Connects Administrator role.
Upgrade
Upgrade for b+s Connects for Unified Service Desk
There is no direct upgrade path from the b+s Connects for Unified Service Desk.
It is recommended installing b+s Connects for Microsoft Dynamics 5.0 or later before uninstalling the former version. Both versions can run in parallel.
Further information can be found in the migration guide.
For detailed installation instructions please refer to the Installation Guide.
Upgrade for b+s Connects for Microsoft Dynamics
Step 1: Go to https://make.powerapps.com.
Step 2: Navigate to Solutions section.
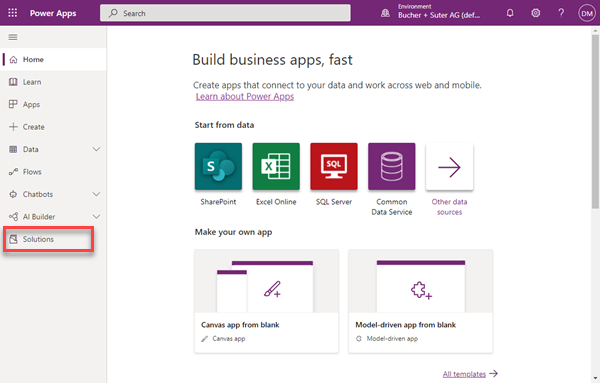
Step 3: Click Import.
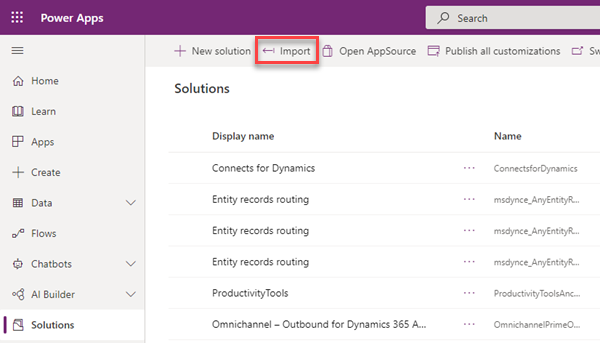
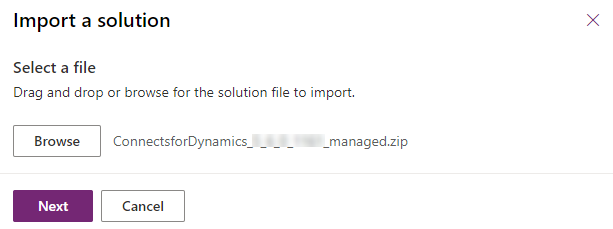
Step 4: Choose the new b+s Connects for Dynamics solution file and click Next
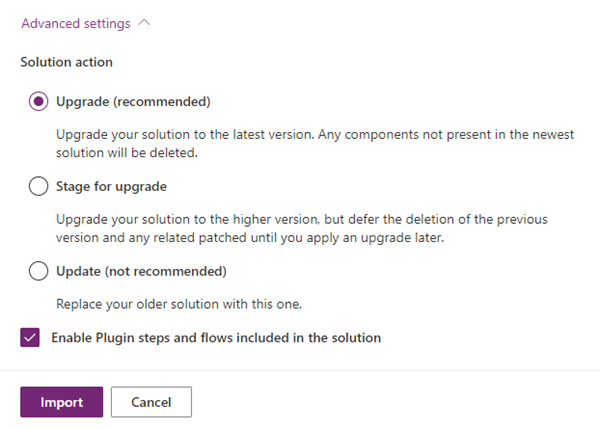
Step 5: Uncollapse Advanced settings, select the recommended and default options and click Import.
Step 6: A notification appears that the import was successful.
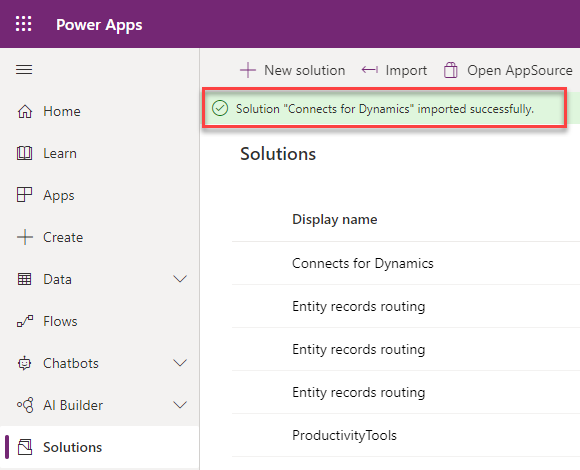
When upgrading from version 6.1 or later, the following notification is displayed instead:
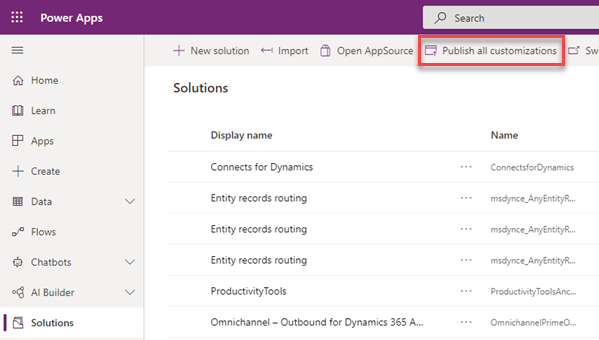
Step 7: Make sure to publish all customizations.
For version specific upgrade information please refer to Features and Limitations.