CRMConnectorSAP
To install the CRMConnectorSAP component, start the installation procedure by executing the Connects for SAP CRMConnectorSAP installer and follow the installation instructions on the screen. In this document only an installation of a single CRMConnectorSAP is described. During the installation procedure configuration dialogs are shown which allow the configuration of the CRMConnectorSAP. These are explained in the following sections.
New Installation
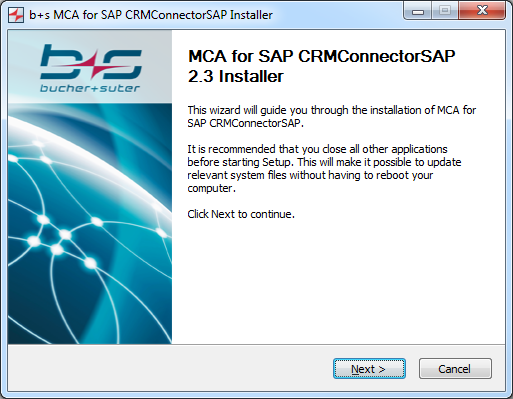
Step 1: Click Next to get to the next screen.
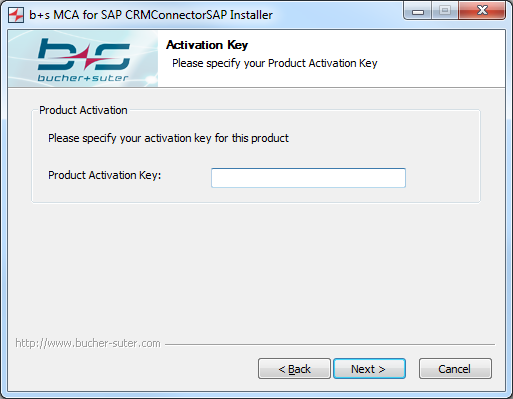
Step 2: Enter the Product Activation Key and click Next.
Step 3: Choose the media channels to use, specify the Application ID and Connector ID of the CRMConnectorSAP instance and click Next to get to the next screen.
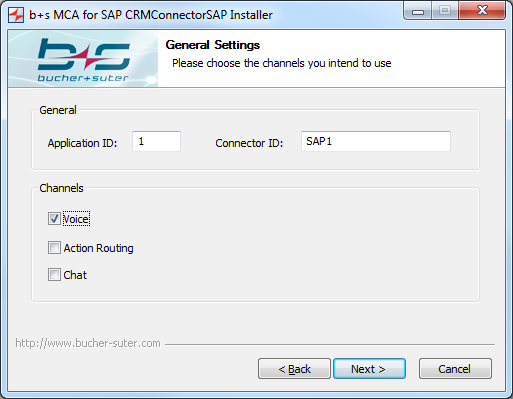
Application ID: Application ID that identifies a CRMConnectorSAP instance towards the MediaManager and DataStore. This ID must be unique among all applications connecting to the MediaManager and DataStore services. If “0” is specified, the CRMConnectorSAP instance gets a random value within the defined range.
Connector ID: Connector ID that identifies the CRMConnectorSAP on its web service. This ID is only visible in responses to HTTP requests and can help to identify a certain CRMConnectorSAP among many.
Voice: Select this checkbox to use the voice channel.
Action Routing: Select this checkbox if to use the action routing channel.
Chat: Select this checkbox to use the chat channel.
Step 4: Specify the settings for the CRMConnectorSAP log files storage and the local remote console port and click Next to get to the next screen.
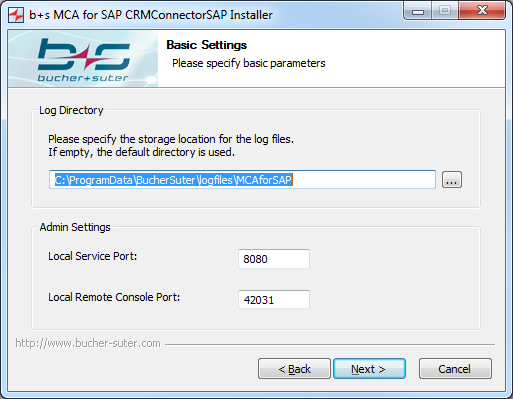
Log Directory: Directory that will be used by the CRMConnectorSAP for logging. Local Service Port: Port that will be used by the CRMConnectorSAP web service. Make sure this port is not used by any other application on the same host. Local Remote Console Port: Port that will be used to access the remote console of CRMConnectorSAP.
Step 5: Specify the settings for the CRMConnectorSAP service and click Next to get to the Summary screen.
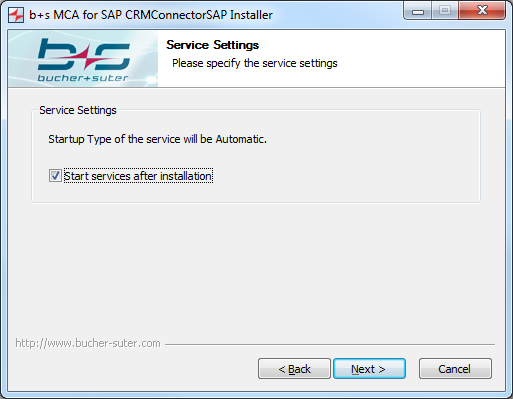
Please note that the CRMConnectorSAP Windows service will be installed to take no action in case of a service failure. The Recovery settings of the CRMConnectorSAP Windows service will therefore be set to “Take No Action” for all three available options (First failure, Second failure, Subsequent failure). It is up to the system administrator to adjust the settings as desired.
Start services after installation: Enables or disables the automatic start of the created CRMConnectorSAP-service after the installation.
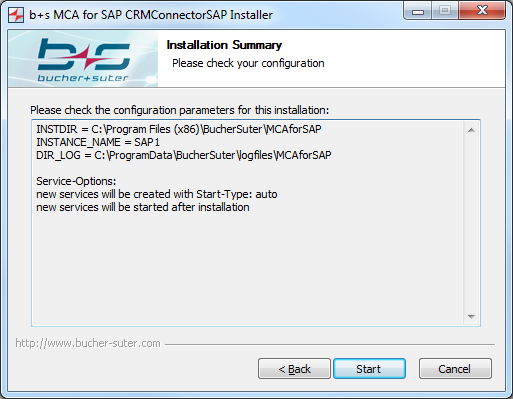
Step 6: This screen displays a summary of entered configuration parameters. Click Start to launch the CRMConnectorSAP installation.
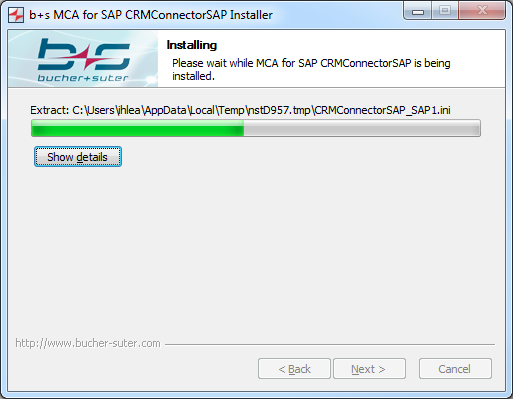
Step 7: Wait for the installation wizard to install CRMConnectorSAP. Select Show details to display more detailed information about the current CRMConnectorSAP installation process
Step 8: b+s App SnapShot is Bucher + Suter’s embedded service tool that helps to gather log files of Connects for SAP components. Click Next to start the installation procedure and follow the instructions on the screen.

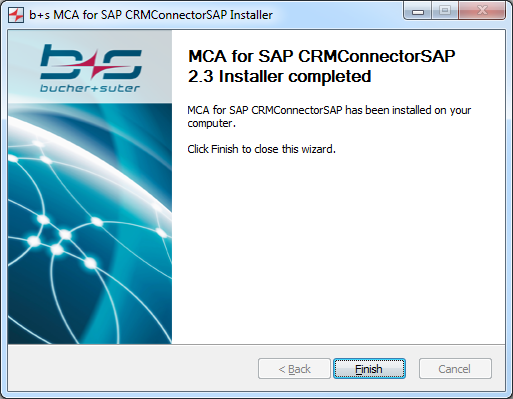
Step 9: The CRMConnectorSAP has been successfully installed on the computer. Click Finish to end the installation wizard.
Upgrade
If you are using the MCA for SAP action item channel, please back up all action item recovery files manually before upgrading the CRMConnectorSAP. It should also be considered to pause the action item push-mechanism in SAP CRM while the upgrade takes place to avoid new action items from getting lost because the CRMConnectorSAP service is unavailable.
Step 1: Click Next to get to the next screen.
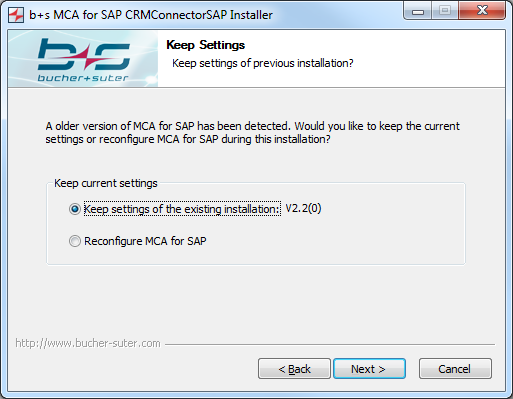
Step 2: Select the desired configuration settings. If the second option is chosen, the procedure is similar to a New Installation of Connects for SAP 2.3 - CRMConnectorSAP except that the existing configuration parameters are displayed on the installation screens. If the path, where the log files are stored, was changed after the installation of MCA for SAP 2.2 manually, this path will no longer be used after the upgrade. The new logfile default path will be used instead.
Step 3: Specify the settings for the CRMConnectorSAP service and click Next to get to the Summary screen. Please note that the CRMConnectorSAP Windows service will be installed to take no action in case of a service failure. The Recovery settings of the CRMConnectorSAP Windows service will therefore be set to “Take No Action” for all three available options (First failure, Second failure, Subsequent failure). It is up to the system administrator to adjust the settings as desired.
Start services after installation: Enables or disables the automatic start of the created CRMConnectorSAP-service after installation.
Step 4: This screen displays a summary of the entered configuration parameters. Click Start to launch the installation of the CRMConnectorSAP.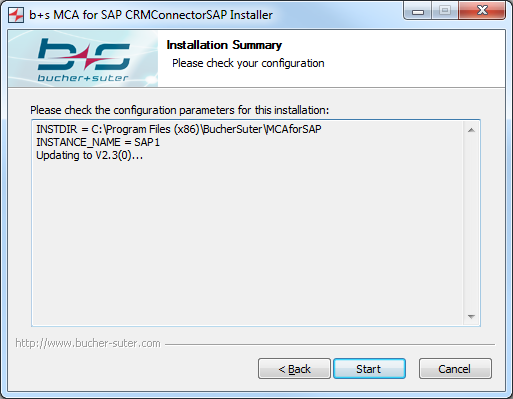
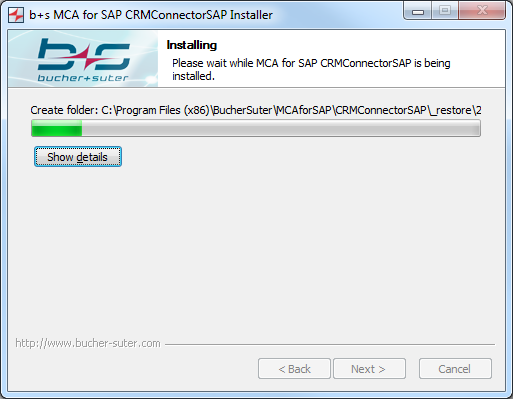
Step 5: Please wait while the CRMConnectorSAP is being installed by the installation wizard. Select Show details to display more detailed information about the current CRMConnectorSAP installation process.
Step 6: b+s App SnapShot is Bucher + Suter’s embedded service tool that helps to gather log files of Connects for SAP components. Click Next to start the installation procedure and follow the instructions on the screen.
Step 7: The CRMConnectorSAP has been successfully installed on the computer. Click Finish to close the installation wizard.