Installation
This chapter outlines the steps required for a new installation of the Connects for Cisco Contact Center CTI Gadget in a Salesforce Org.
To perform a new installation, follow the "Wizard installation with Lightning Setup flow" steps.
The package can also be manually installed via AppExchange (e.g. in case of patch releases). We suggest following this installation method only if recommended by your Bucher+Suter sales representative.
- Wizard installation with Lightning Setup Flow (recommended)
- Manual installation with AppExchange
- Upgrade from previous versions
Wizard installation with Lightning Setup Flow
For new installations, installing b+s Connects using the Lightning Setup Flow is recommended.
To trigger the Lightning Setup Flow, you will need to open the Service Setup page from a user with Service Cloud User permissions.
In case your user does not have the Service Cloud User permissions, you can add them manually via Setup | Users | Edit (the selected user) and by selecting the Service Cloud User option.
| Step | Image |
|---|---|
| Assign Service Cloud User to the current admin user |  |
| After assigning the Service Cloud User, click on the top right Setup wheel > Service Setup | 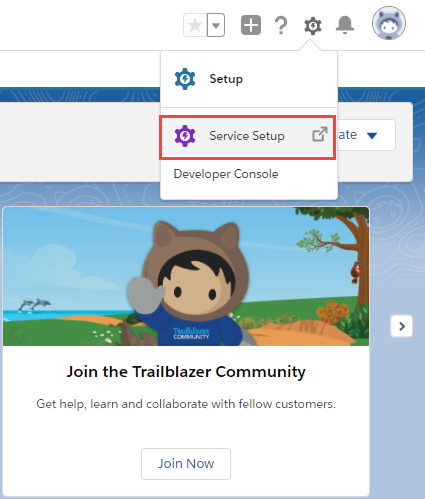 |
| In the new page, you will need to access the "View All" option on the top right from the Recommended Setup section | 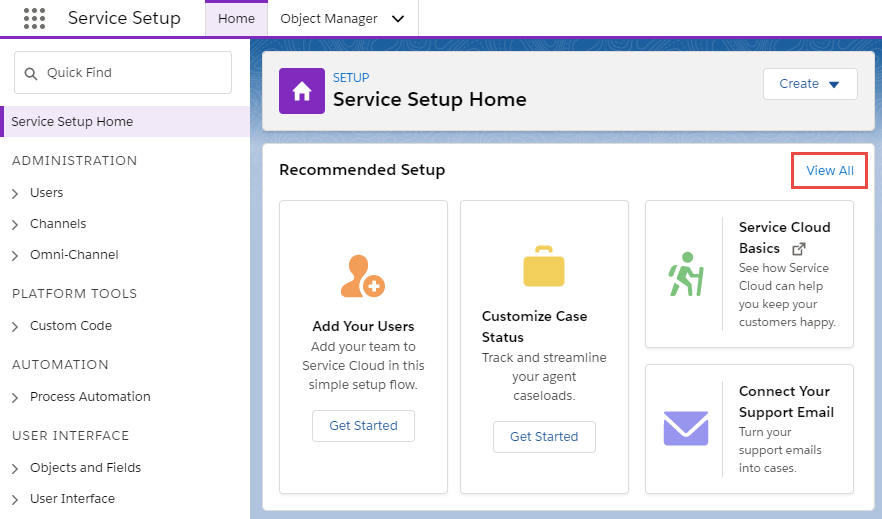 |
| Search for "Add Phone Support" in the new Setup Modal window opened in the last step. | 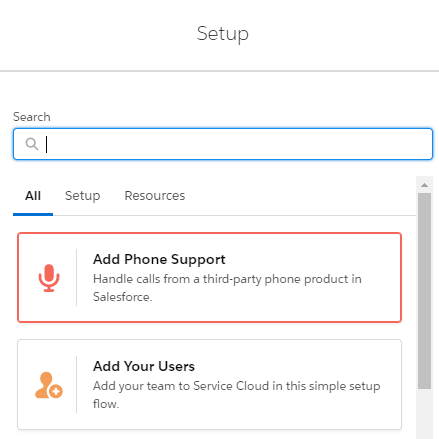 |
| Click Start button | 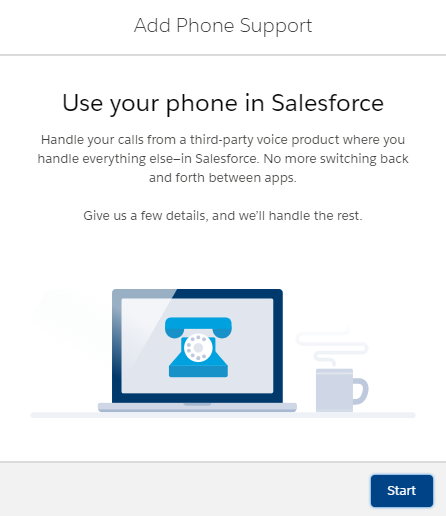 |
| Select b+s Connects for Cisco Contact Center | 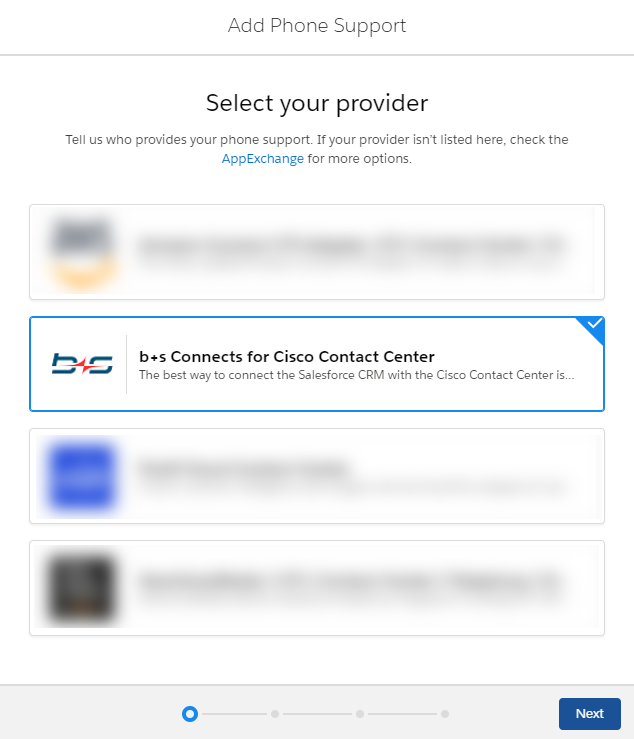 |
| Read and agree to the AppExchange Terms and Conditions and click Install | 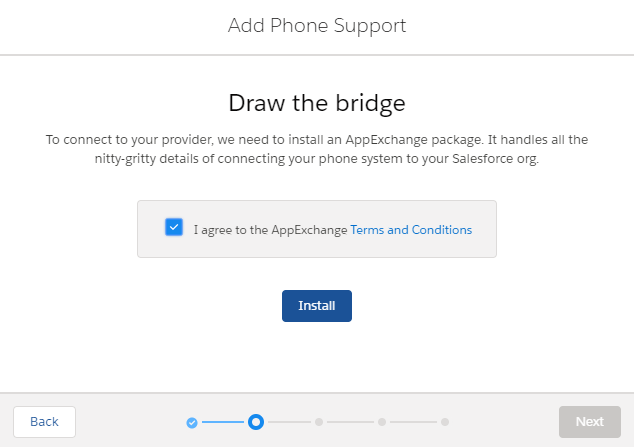 |
| At this point, the package will start to install. After a few minutes, it will confirm the installation and go to the next step | 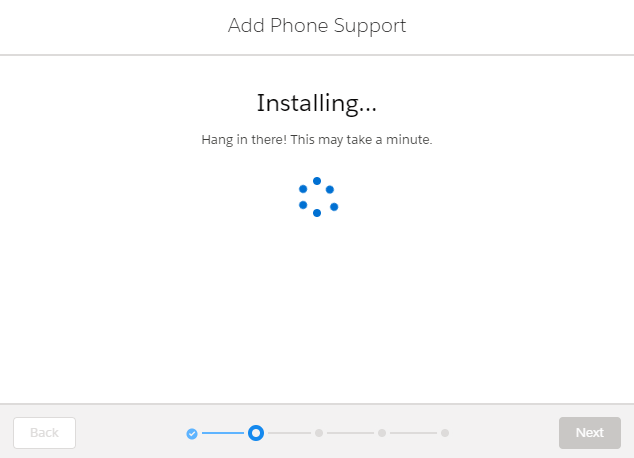 |
| At this point select the Finesse server which the Softphone will connect to | 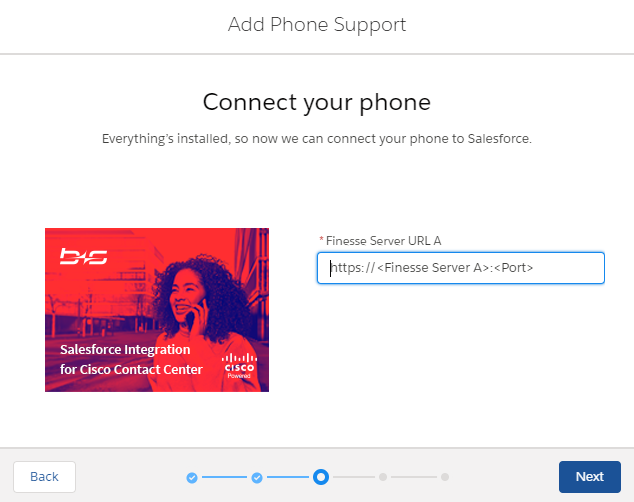 |
| And select the users that will belong to the phone team | 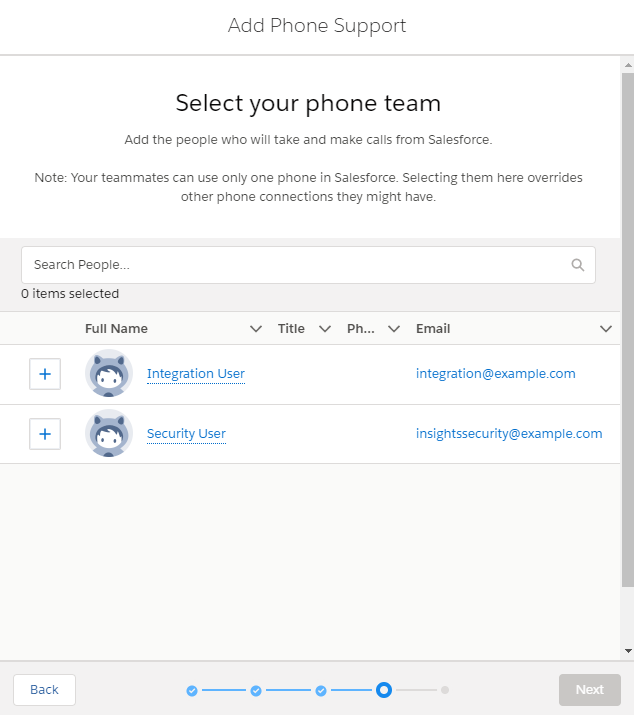 |
| As the last step of this setup flow, you will need to assign licenses to the previously selected users. See section Assign package license to users if you need further information | 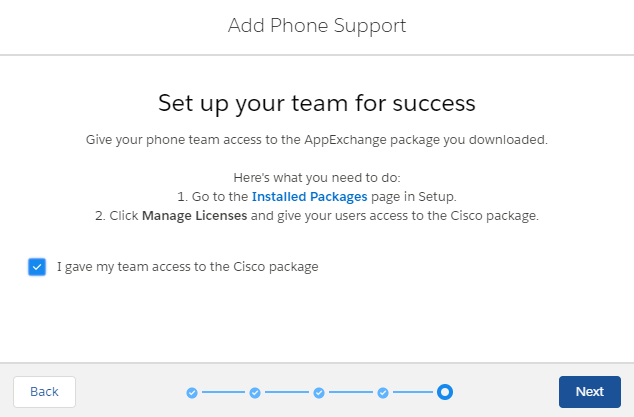 |
| Congratulations! You have successfully finished the Lightning Setup Flow | 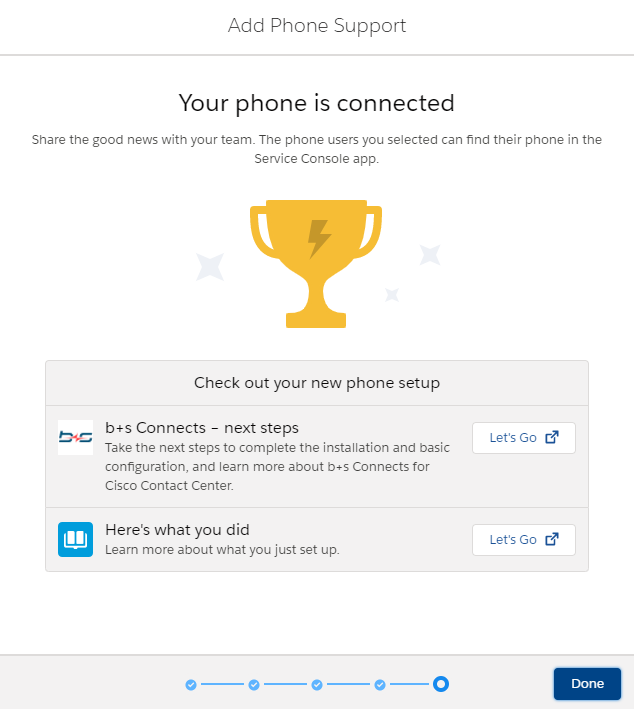 |
When installing the Connects for Cisco Contact Center Package using Lightning Setup Flow, the package is installed “for All Users”.
The Connects for Cisco Contact Center Gadget is now installed and can be configured by following the steps described in Post Installation Steps.
Manual installation via AppExchange or direct link
The application type is Composite, and it is distributed as a managed package.
Download and install the package
The latest stable release of the Cisco Contact Center Package is available in AppExchange: https://appexchange.salesforce.com/listingDetail?listingId=a0N300000059NTvEAM
To install the package in a Sandbox, the credentials used in the Salesforce login page must correspond to the Sandbox Org in which the Package must be installed.
Patch releases are provided directly or on request by Bucher + Suter. To install a patch release in a Sandbox environment, replace the "login.salesforce.com" part of the URL with "test.salesforce.com".
To install the package:
- Open AppExchange or the package link provided to start the installation
- Login to the Salesforce organization where the package will be installed
- In the installation wizard, choose the security option "Install for Admins Only" (1) and click Install (2).
Note: It will be necessary to decide which users get certain permissions to the objects and components that come with the b+s Connects for Cisco Contact Center package. In addition, granting them these permissions (which is aided by the Permission Sets that come with the b+s Connects for Cisco Contact Center package) is also needed.
Package installation wizard – Welcome screen

We do not recommend choosing the "Install for All Users" option, as this will grant all permissions (read, create, edit and delete) on the package components and objects to any user who uses a custom User Profile. As an example, these permissions would also enable these users to edit the Configuration of the b+s Connects Gadget or to access the supervisor page.
Due to a limitation in Lightning dashboards, it is possible from for an upgrade from version 5.5 to fail. Please create a permission set with the 'Change Dashboard Colors' permission and assign it to the user installing the release. For more information see https://help.salesforce.com/s/articleView?id=000349418&type=1
Once the installation is complete:
- To use a Finesse hosted deployment, use the link
Connects Gadget
(to copy on Finesse server)
to download the Connects Finesse Gadget. - For SSO deployments, download the Finesse SSO Frame with the
Finesse SSO Frame (to copy on Finesse server)link.
- To use a Finesse hosted deployment, use the link
Click Done to exit the installation wizard
Package installation wizard – Completion screen

If the installation fails, please contact the b+s Support Center reporting the errors encountered in the most detailed way. If possible, also take a screenshot of the page where the error occurred.
Assign Package License to Users
Before your users can work with the Connects for Cisco Contact Center application they need a package license to be assigned.
Beta packages and trial installations in Salesforce sandboxes do not need a license. In these situations there is no Assign License button available therefore please ignore the steps below.
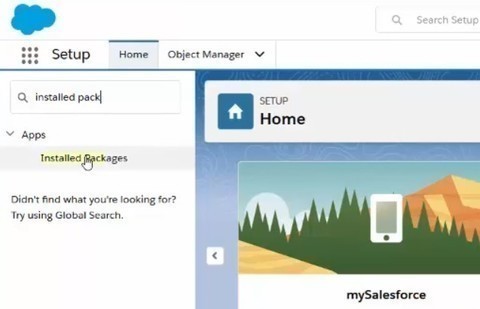
- Click Setup | Apps | Packaging | Installed Packages
- Click Manage Licenses next to the recently installed Connects for Cisco Contact Center application
- Click the Add Users button
- Select the user or users to assign the license to and click Add
Five, thirty day production licenses are available without needing to register them. If and When purchased, the licenses need to be registered and enabled by contacting your sales representative with your Production ORG Id.
Post Installation Steps
Assign Permission Sets to Users
To enable Agents, Supervisors and CRM Admins to access the package components that they work with, access to them must be granted. This can easily be done by assigning them the Permission Sets that come with the b+s Connects package.
Assign Permission Set for Connects Configuration Admins
b+s Connects for Salesforce uses a custom object for configuring the agent experience - the b+s Configuration. In order to use this, a Salesforce user needs the b+s Configuration Editor Permission Set.
- From Setup, enter Permission Set in the Quick Find box and select Permission Sets
- Open b+s Configuration Editor
- Press Manage Assignments
- Press Add Assignments
- Select the Users who work as b+s Configuration administrators
- Press Assign
Assign Permission Sets for Agents and Supervisors
Agents require access to certain resources of the b+s Connects package. These permissions are defined in the b+s Connects Agent Permission Set. For Supervisors there is an additional Permission Set called b+s Connects Supervisor.
- From Setup, enter Permission Set in the Quick Find box and select Permission Sets
- Open b+s Connects Agent
- Press Manage Assignments
- Press Add Assignments
- Select the Users who work as agents
- Press Assign
- Repeat the steps above and additionally assign the Permission Set b+s Connects Supervisor to users who work as supervisors
b+s Configuration records
Where to find the b+s Configuration
In order to see the b+s Configuration, the logged in user needs to have the b+s Configuration Editor Permission Set. For more information please check Assign Permission Set to Users.
In order to use the b+s Configuration object, it has to be assigned to a Salesforce App.
- From Setup, enter "App" in the Quick Find box and select App Manager
- Edit the Lightning App which should contain the b+s Configuration.
- Press Navigation Items
- In the search bar type "b+s", select b+s Configuration and click on the arrow pointing to the right.
- Press Save
Now you can open the edited Salesforce App and you will find the b+s Configuration object.
Default b+s Configuration and b+s Configuration Assignment
There is always at least one b+s Configuration which is set as the default configuration. If an Agent is not assigned to any b+s Configuration, this default configuration will be used.
To assign a specific b+s Configuration to a Salesforce user, follow the instructions in the Assign Users to b+s Configuration chapter.
A b+s Configuration can be assigned to multiple Salesforce users.
Edit the b+s Configuration
The b+s Configuration object is split up into multiple sections. In the top part you can save your changes and set the configuration as default.
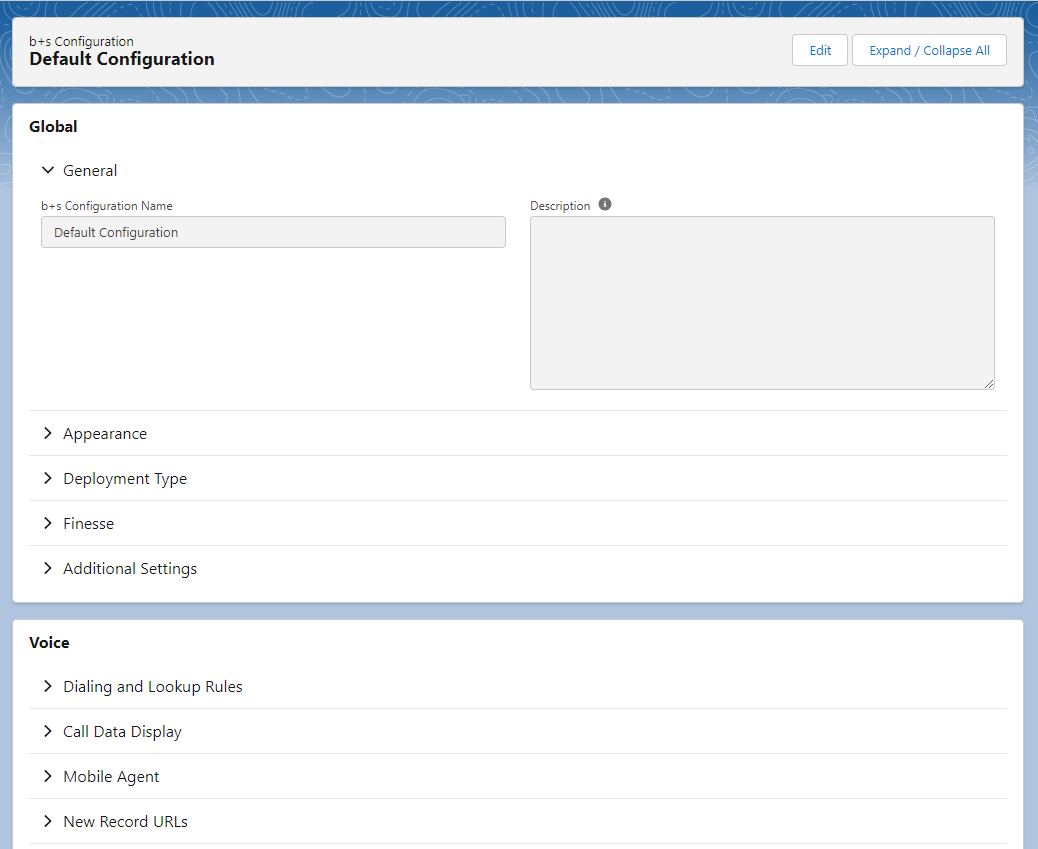
- General In this section you can configure the settings that are not specific to your deployment type.
- Voice Here you can find all settings to do with the voice channel.
- Integrations This section is needed for custom integrations and b+s Connects for Salesforce application extensions.
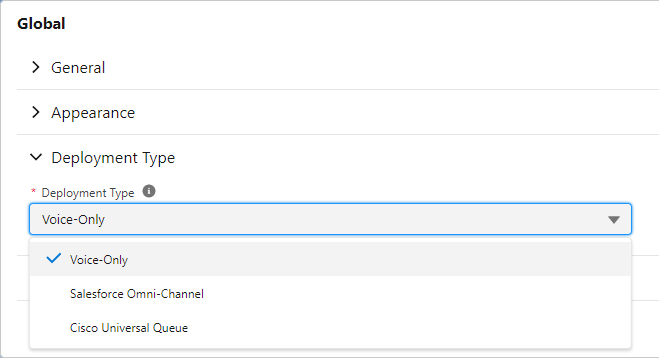
In the general section you can select the deployment type for this b+s Configuration.
The deployment type determines which cisco channels are available for the assigned users.
For more information, please check the installation and configuration guide.
Tip: Use the edit mode to view the b+s Configurations, as it shows the configuration in a easier to read format.
Configure Finesse URL's in default b+s Configuration
- Open the App Launcher
- Open All Items | b+s Configurations
- Switch view from Recently Viewed to View All Configurations
- Open Default Configuration
- In section Finesse configure Finesse URL A and Finesse URL B
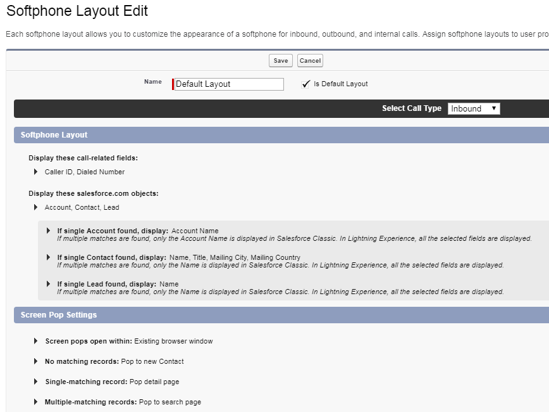
Configure the Screen Pop & Softphone
- From Setup, enter Call Center in the Quick Find box and select Softphone Layouts
- Make sure a default softphone layout exists – if not, select New
 |  |
|---|
Tip 1: Validate the default and ensure a default Softphone Layout exists
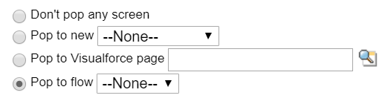
Tip 2: Do not forget that you can utilize flows and Visualforce Pages
Additional information can be found in the Create a Softphone Layout section of the Configuration tutorial.
Enabling Lightning Agent Desktop
- From Setup, enter "App Manager" in the Quick Find box and select App Manager
- Find the desired Salesforce Lightning App
- Select Edit
- In the Lightning App Builder, select Utility Bar
- Select Add
- Search for CTI
- Click "Open CTI Softphone" to add the utility to the Lightning app
- Update the label to b+s Connects
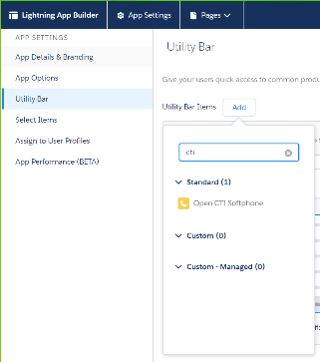 | 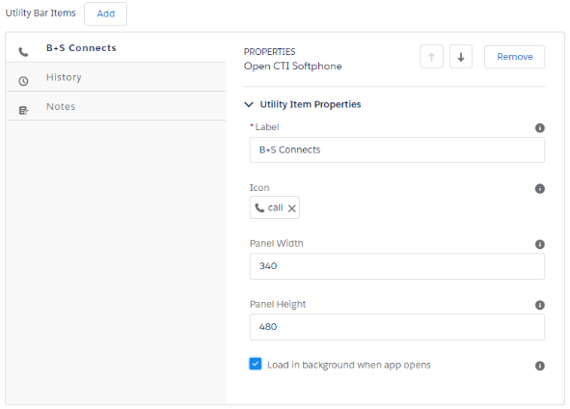 |
|---|
Update the User Layout with the new Agent fields
To enable the Connects Gadget for single sign on or to preselect user credentials in the login dialog box, the Connects for Cisco Contact Center package contains custom user fields that can be added to a User layout.
Add a new settings section to the User Layout and add the packaged fields
- Click Setup | Objects and Fields | Object Manager
- Click on the User object | User Pages Layout | User Layout
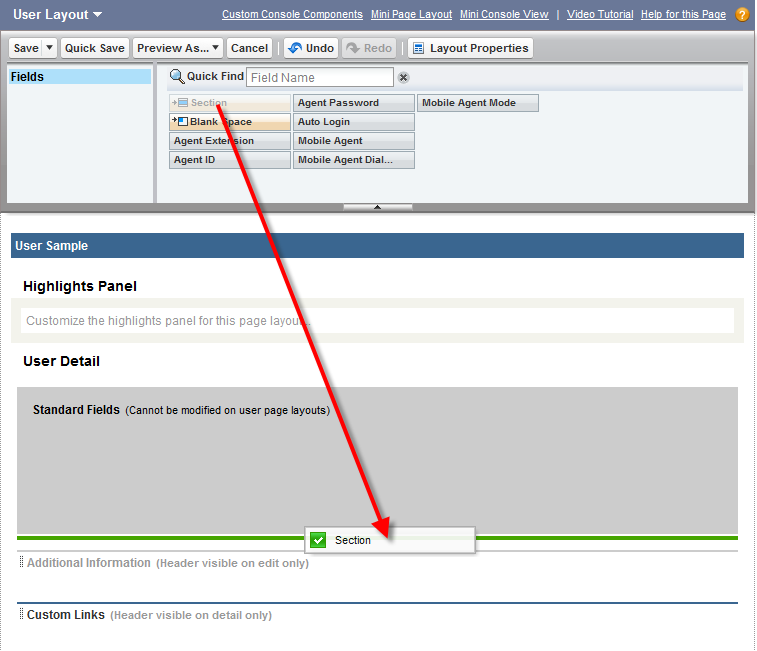
- Drag and drop a section on top of Additional Information
Add Section to User Layout
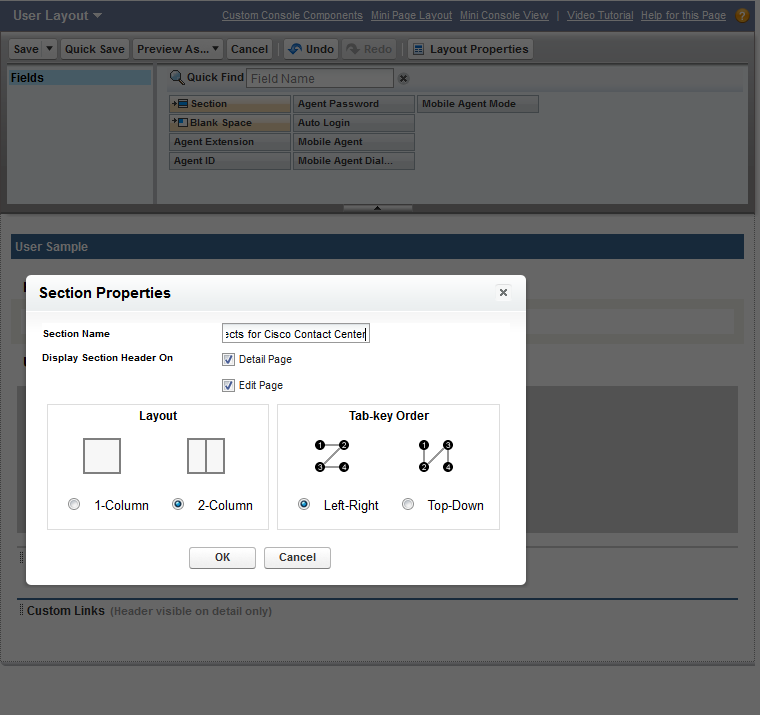
- Enter a title of your choice (e.g. Connects for Cisco Contact Center),
select the Options
Detail PageandEdit Page; select2-Columnoption under Layout.
Settings of New Section in User Layout
- Drag and drop the Agent fields into the new section
Drag and Drop Fields in User Layout
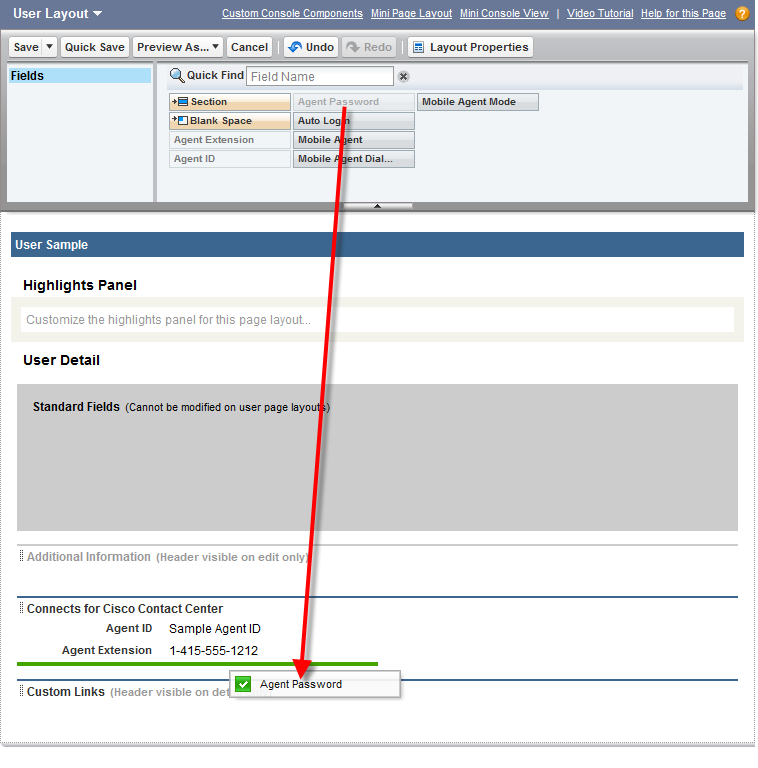
Do not add "Speed Dial Numbers" field to the page layout. The speed dial numbers can be configured in the settings panel on the Connects Gadget.
If you have several b+s Connects Editions installed, it is possible that multiple fields with the same name exist. To identify the correct fields for the Connects for Cisco Contact Center, move your mouse over the field and take the ones with the "cnx" name prefix.
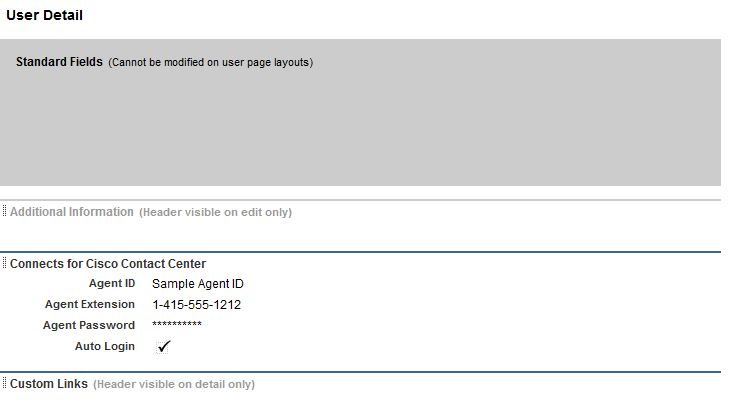
Complete User Layout
Mobile Agent Fields
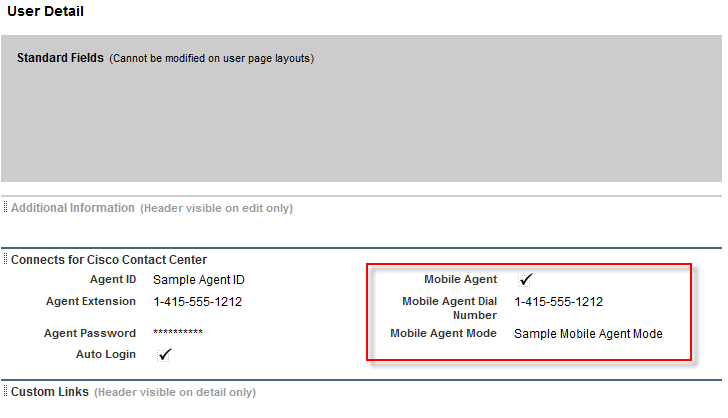
If you are working with a CCX deployment the mobile agent fields are not needed since this feature is not available.
Click Save
After this configuration, the users will see a section with these fields in their Personal Information page: (Located under User Icon (Top Right) | Settings | My Personal Information | Advanced User Details)
Users Personal Information Page

Agent Fields
All the information stored in the agent fields are pre-filled in the Connects Gadget. Users could still be required to manually fill in missing information when logging in to the Connects Gadget.
Agent Id
The agent login identifier
Agent Extension
The agent extension the agent uses to login
Agent Password
The agent password the agent uses to login
Auto Login
If checked, the user gets automatically logs in with the information sent in the other agent fields
Default: false
Mobile Agent
If checked, the user logs in as a mobile agent
Mobile Agent Dial Number
The phone number that the mobile agent calls are redirected to
Mobile Agent Mode
The mobile agent delivery mode. If Mobile Agent is enabled, one of the following two options must be selected:
In CALL_BY_CALL mode, the mobile agent phone is dialed for each incoming call.
In NAILED_CONNECTION mode, the agent is called at login time and the line stays connected through multiple customer calls.
Login and Test
- From the App Launcher, select the previously assigned app
- Verify that the Connects for Salesforce gadget loads
 |  |
|---|
Tip: Do not forget to add your phone number to test "screen pop"
Custom Telephony Rules
This step is not required to start with and may include advanced configuration options. Please proceed to skip this if it is not required at this time.
- Open a b+s Configuration custom object
- Press Edit
- In the section Voice, click on Dialing and Lookup Rules
- DIALING RULES
- Add 91 to an outbound call:
->91
- Add 91 to an outbound call:
- LOOKUP RULES
- Remove leading
+:+->
- Remove leading
Tip 1: Do not forget edge cases like international numbers, internal dialing, and toll free numbers
Tip 2: For more details please see the Voice Configuration section of the installation guide